
In the Top It Off (from Karen W.) Building Lesson Part 1, I shared a new activity from Karen just the way she sent it to us. The challenge I ended with was to take the activity and adjust it (build it out) in a way to reach a particular goal or outcome that came to your mind. Then I promised to share my build in this week's post.
If you haven't yet, you might like to read (and build if you have the time) the initial post (Part 1) before diving into my tweaks. Again, Karen's activity is good to go just the way it is. My intention is to reveal a little bit about my approach/thinking when it comes to adapting activities to meet specific learning opportunities.
If you haven't yet, you might like to read (and build if you have the time) the initial post (Part 1) before diving into my tweaks. Again, Karen's activity is good to go just the way it is. My intention is to reveal a little bit about my approach/thinking when it comes to adapting activities to meet specific learning opportunities.
Top It Off 2
(Increasing opportunities for problem-solving and group development.)
Time: (Chris) 30 to 40 minutes. With additional ‘problems’ to solve, Top It Off 2 might need more time to get in three or four (or five) rounds to see significant improvement.
Group Size: (Chris) 10 to 16 participants.
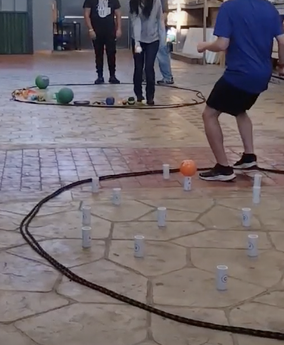
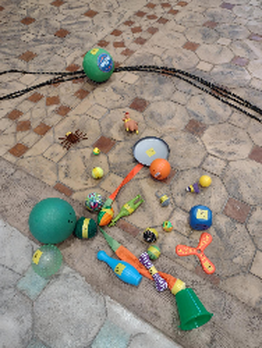
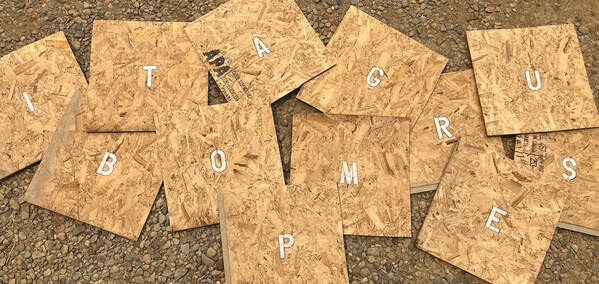
Supplies: (Chris) 26 Numbered (or Lettered) PVC Tubes (clean toilet paper rolls work well), and 26 Numbered (or Lettered) safe tossable items (see the picture in Part 1). You will also need two activity ropes – one approximately 25 feet long, the other 50 feet long.
Basically, the same supplies. However, Circle B will be larger than the original Top It Off, so you’ll need a longer rope (~50 feet) for a 15-foot diameter.
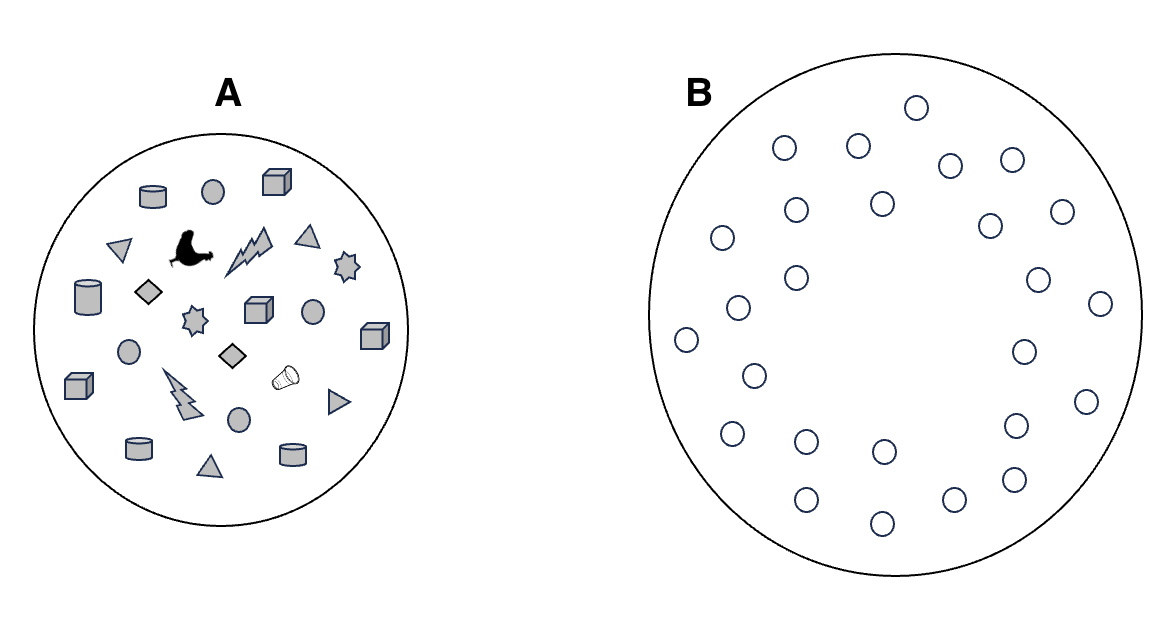
Layout (Original): One rope circle with randomly placed items marked with numbers 1 to 26 (Circle A), and one rope circle with randomly placed tubes (Circle B) marked with numbers 1 to 26. Rope circles are about six feet in diameter. Rope circles are about 10ft. apart.
Layout (Chris): Here’s where we can make adjustments to meet different challenge levels. First, I would adjust the original distance between Circles A & B to match the (assumed) throwing and catching skills and abilities of my group.
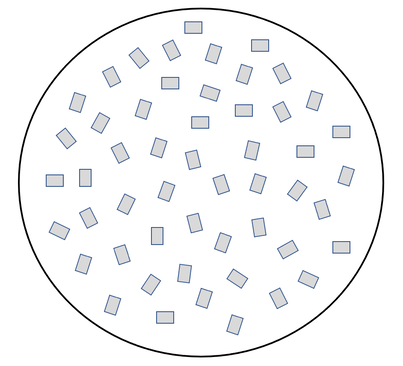
For older elementary ages I’d keep the original spacing of 10 feet apart. Middle school ages I’d go 12 to 15 feet apart. And high school ages and older 15 to 20 feet apart. One other layout adjustment I’ll make is to increase the diameter of Circle B to 15 feet and set down the marked tubes as shown in the diagram above with a noticeable open area in the center of the circle (we’ll get to why in just a moment). Circle A is set up as in the original version.
Basic Description (Original): The challenge is to get all the numbered items from Circle A to Circle B balanced on top of the matching tube. The goal is to do it as quickly as possible with the least number of penalties.
Basic Description (Chris): The adjustment I’ll make here is to separate the description into the ‘Challenge’ and the ‘Goal.’ Just a slight tweak so I can emphasize the different outcomes.
After a timed attempt I can ask, “Did you complete the challenge?” A “Yes” confirms success (and celebration). Then I can follow up with, “Did you meet your goals?” (Referring back to the product-oriented goals they set before the attempt – a time goal and a penalties goal. And if you bring in the concept of ‘process-oriented’ goals, did they achieve these?)
The Challenge: Get all the numbered items from Circle A to Circle B and balance them on their matching numbered tubes.
The Goals: Balance all items on their tubes as quickly as possible and with the fewest number of penalties.
Before each attempt, I will have the group choose a time goal – how fast can they get all the items atop the tubes – and a penalty goal – the number of penalties they need to complete the challenge.
Multiple rounds (e.g., two or three) are played each with a 2-minute planning period (Original).
The latter first. When it’s important for my groups to practice planning behaviors, I might require a mandatory minimum time to plan so I know we’ll have something to talk about.
The former. I’m a fan of improvement-oriented activities. And I like to allow time for three or four (even more) attempts (see my ‘long-form’ activity argument). There are certainly programming benefits to moving on after two attempts when the second was better than the first. The group has success, has shown they can be successful together. These feelings can carry over into the next activity and (possibly) motivate performance. But what if?
Additional attempts with the same task inevitably provide more for me to work with. Here are several possibilities:
(Increasing opportunities for problem-solving and group development.)
Time: (Chris) 30 to 40 minutes. With additional ‘problems’ to solve, Top It Off 2 might need more time to get in three or four (or five) rounds to see significant improvement.
Group Size: (Chris) 10 to 16 participants.
Supplies: (Chris) 26 Numbered (or Lettered) PVC Tubes (clean toilet paper rolls work well), and 26 Numbered (or Lettered) safe tossable items (see the picture in Part 1). You will also need two activity ropes – one approximately 25 feet long, the other 50 feet long.
Basically, the same supplies. However, Circle B will be larger than the original Top It Off, so you’ll need a longer rope (~50 feet) for a 15-foot diameter.
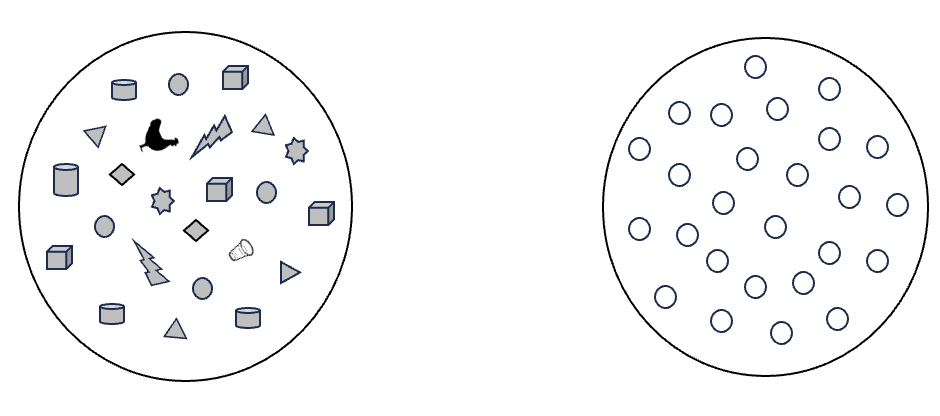
Layout (Original): One rope circle with randomly placed items marked with numbers 1 to 26 (Circle A), and one rope circle with randomly placed tubes (Circle B) marked with numbers 1 to 26. Rope circles are about six feet in diameter. Rope circles are about 10ft. apart.
Layout (Chris): Here’s where we can make adjustments to meet different challenge levels. First, I would adjust the original distance between Circles A & B to match the (assumed) throwing and catching skills and abilities of my group.
For older elementary ages I’d keep the original spacing of 10 feet apart. Middle school ages I’d go 12 to 15 feet apart. And high school ages and older 15 to 20 feet apart. One other layout adjustment I’ll make is to increase the diameter of Circle B to 15 feet and set down the marked tubes as shown in the diagram above with a noticeable open area in the center of the circle (we’ll get to why in just a moment). Circle A is set up as in the original version.
Basic Description (Original): The challenge is to get all the numbered items from Circle A to Circle B balanced on top of the matching tube. The goal is to do it as quickly as possible with the least number of penalties.
Basic Description (Chris): The adjustment I’ll make here is to separate the description into the ‘Challenge’ and the ‘Goal.’ Just a slight tweak so I can emphasize the different outcomes.
After a timed attempt I can ask, “Did you complete the challenge?” A “Yes” confirms success (and celebration). Then I can follow up with, “Did you meet your goals?” (Referring back to the product-oriented goals they set before the attempt – a time goal and a penalties goal. And if you bring in the concept of ‘process-oriented’ goals, did they achieve these?)
The Challenge: Get all the numbered items from Circle A to Circle B and balance them on their matching numbered tubes.
The Goals: Balance all items on their tubes as quickly as possible and with the fewest number of penalties.
Before each attempt, I will have the group choose a time goal – how fast can they get all the items atop the tubes – and a penalty goal – the number of penalties they need to complete the challenge.
Multiple rounds (e.g., two or three) are played each with a 2-minute planning period (Original).
The latter first. When it’s important for my groups to practice planning behaviors, I might require a mandatory minimum time to plan so I know we’ll have something to talk about.
The former. I’m a fan of improvement-oriented activities. And I like to allow time for three or four (even more) attempts (see my ‘long-form’ activity argument). There are certainly programming benefits to moving on after two attempts when the second was better than the first. The group has success, has shown they can be successful together. These feelings can carry over into the next activity and (possibly) motivate performance. But what if?
Additional attempts with the same task inevitably provide more for me to work with. Here are several possibilities:
- More ‘problems’ can be identified and solved (problem identification is, I believe, an essential human development skill).
- More time to practice the skills (physical and cognitive) that the group finds helpful in the task’s context. As we know about ‘transferring’ skills to the future, why not stay in the present to get better at them instead of changing the context, which requires time to process new information about a different task?
- More opportunity for participants to challenge each other during the planning and implementation of the task (in other words, get them to ‘storm’ a little to get to the norming behaviors they want). It takes time for some people to build the courage to speak up. When we’re constantly switching activities, new information gets in the way of that ‘ordinary courage’ (Brene’ Brown speaks of) to share our thoughts and feelings.
- More failure and time to learn about the benefits of that failure. Getting better at something, as we know, takes practice and a lot of setbacks. To really see what the group can do (or not do because of certain behaviors), we’ve got to stick with one thing to mine out the gold. Two attempts scratch the surface, and five attempts get down to the roots! I believe that’s where the real work is.
Here are the original Rules (Bold) and the Tweaks I'll make:
Items must be thrown from one circle to the next. The item cannot touch the ground.
(Chris) Numbered items must be thrown from Circle A to Circle B (to clarify the throwing direction and only 'numbered' items are thrown – "What is an item?"). The numbered items cannot touch the ground.
Items must be placed on the tube with the same number in numerical order.
(Chris) Numbered items must be placed on the tube with the same number in numerical order – 1 to 26. (Again, specific to what an 'item' is, and the expectation is starting with number one.)
You can only touch the items while in the circle.
(Chris) You can only touch the numbered items while inside a rope circle. (A slight clarification of expectations – a bit clearer about being inside either circle. Consider this: What if someone encircled someone else with their arms? The original Rule would allow for this – and that’s okay! Clever actually.)
Only one person in each circle at a time.
(Chris) I will not use/share this Rule. Taking out this limit will create additional problems to solve and provide more opportunities for action. SAFETY NOTE: Without the original Rule the risk level does increase. This is why you want to provide ‘safe’ tossable items. If we see an unsafe level of chaos, we will stop the activity and process what is going on. Then make plans to move forward in a safer manner. (A quote from Karl Rohnke, “If we take out all the risk, it’s no longer an adventure.”)
I increased the size of Circle B to entice more group members to be inside this circle at a time. The more people in either circle, the more problems to solve – some problems will be solved beforehand, and others will need to be solved later (maybe they decide to only have one person in a circle at time). Having the tubes closer to the rope (in Circle B) will also create more problems to solve.
Everyone must throw at least once.
(No Change) This Rule does force some participation – so, we can talk about, "life is about participating."
Everyone must catch at least once.
(No Change) Forced participation again – always good to talk about.
You cannot catch or throw 2 times in a row.
(Chris) I will not use this Rule. With ‘no-limit’ to the number of participants in a circle, this Rule is obsolete.
Ropes cannot be moved.
(No Change)
Tubes cannot be moved.
(No Change)
If a tube gets knocked over after it has an item on it, there is a 5-second penalty and the item must be reset on top of the tube.
(Chris) If a tube and item are knocked over, the two must be set up right before the next item (in numerical order) can be placed on top of its tube. A penalty is enforced for the item touching the ground.
If an item is not caught, it is returned to the throwing circle and they can try again. (No penalty unless an item and tube are knocked over.)
If an item is not caught, it must be returned to Circle A. A penalty is enforced for the item touching the ground. And remember, items must be placed on the tubes in numerical order.
All penalties will add 5 seconds to the end time.
(Chris) Any Rule violation will result in a 5-second penalty – five seconds will be added to the timed attempt.
A 2-minute planning period is required before each round.
The timer starts at the end of the 2 minutes.
(Chris) When I enforce a 2-minute planning period, I’ll combine these two Rules.
Original Reflection Questions:
- Did your team use the planning time effectively?
- Who was responsible for the success or failure of the activity?
- What roles and responsibilities did your process include?
- Did any of the roles and responsibilities change after you started your process? Why did this happen?
(Chris) Expanded Reflection Questions:
- What problems did you anticipate and solve before you even got started?
- What problems showed up that you did not anticipate? What did you do about them during the activity? What did you do about the problems after the activity?
- Describe the planning that took place before a timed attempt? What did it look like? What did it sound like? What could have made your planning times better?
- Recall what happened within the group when a penalty occurred? What did it look like? What did it sound like? What could have been better about the reactions after a penalty?
- What specific behaviors led to your success? What specific behaviors lead to some of your failures?
- What do we want to remember about failures? How do we want to treat each other after there is a failure? Why is this important?
There's a lot mashed up in the build I went through above. I hope you can see the tweaks I made to Karen's original Top It Off and why I made them. For some clarity I've written up a sample script for Top It Off 2 - what I would say to a group.
| top_it_off_2_script_1.0.pdf |
We would love to find out about your build. How did you Tweak Top It Off? Leave us some notes in the Comments.
All the best,
Chris Cavert, Ed.D.
All the best,
Chris Cavert, Ed.D.


 RSS Feed