

Our friend from Israel sent us a version of the Human Bingo icebreaker. Historically (for me), everyone gets a handout with a 5 by 5 grid (25 squares – the center square is a 'free' space). In each square is an experience of some kind, like, "Favorite pizza topping is pepperoni," or "Has been to Ireland," or "Rides motorcycles." To play, everyone mingles around looking for people in the crowd that have had these experiences. Once they find someone, they ask the person to sign the square.
The Objective: Collect enough signatures to get 'five in a row' vertically, horizontally, or diagonally so you can yell, "BINGO" and win the game. Or, as I've played it from time to time, get as many BINGOs as possible in the time allowed – so you can meet and connect with more people. (Search "Human Bingo" on the net for tons of examples.)
Our friend found an alternative approach to the basic Human Bingo encounter called, 'Back to Nurture Bingo' in the book, Playful Activities for Powerful Presentations (1993), by Bruce Williamson. (And I do want to find out how our friend got a hold of a copy?!)
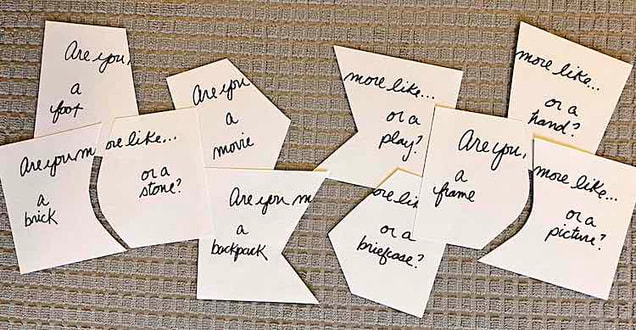
In Williamson's version, along with some of those 'typical' icebreaker questions (e.g., "If you could live anywhere, where..."), there are prompts to life stories, like, "Describe a perfect day," "Children are," and, "What fills you with a sense of wonder?" This changes the quick-search-find-and-sign squares into little conversations.
Williamson's version also includes an additional feature that elevated this activities status for me (meaning, I'll be using this version). There are 'tasks' including in the experience. If you've ever played the task version of 52 Card Pick Up, it's like that (just not as many tasks). Check out the grey squares above to get the idea.
Stories & Connections
I was part of an open-enrolment activity training recently and thought it would be a nice audience to try this out with, so I made us a handout (below) to get us started.
You'll find the instructions included on the handout (you can see them in the header above). Here are a few things I want to tell you about the handout:
One last thought about Stories & Connections. I'd like to develop additional handouts with more focused topic (concept) stories like Leadership, Trust, Helping, Relationships, or Preferences. Then, we can be even more intentional about working on group outcomes.
Here you go!
The Objective: Collect enough signatures to get 'five in a row' vertically, horizontally, or diagonally so you can yell, "BINGO" and win the game. Or, as I've played it from time to time, get as many BINGOs as possible in the time allowed – so you can meet and connect with more people. (Search "Human Bingo" on the net for tons of examples.)
Our friend found an alternative approach to the basic Human Bingo encounter called, 'Back to Nurture Bingo' in the book, Playful Activities for Powerful Presentations (1993), by Bruce Williamson. (And I do want to find out how our friend got a hold of a copy?!)
In Williamson's version, along with some of those 'typical' icebreaker questions (e.g., "If you could live anywhere, where..."), there are prompts to life stories, like, "Describe a perfect day," "Children are," and, "What fills you with a sense of wonder?" This changes the quick-search-find-and-sign squares into little conversations.
Williamson's version also includes an additional feature that elevated this activities status for me (meaning, I'll be using this version). There are 'tasks' including in the experience. If you've ever played the task version of 52 Card Pick Up, it's like that (just not as many tasks). Check out the grey squares above to get the idea.
Stories & Connections
I was part of an open-enrolment activity training recently and thought it would be a nice audience to try this out with, so I made us a handout (below) to get us started.
You'll find the instructions included on the handout (you can see them in the header above). Here are a few things I want to tell you about the handout:
- To change things up a bit, and to add some emotion (as well as, to avoid the traditional 'finality' of the word BINGO), when players do get five in a row, I've asked them (in the instructions) to yell, "Fantastic." (We had a few of these during the training – it evoked smiles.)
- I added one more row to the traditional 5 by 5. By doing this, there are eight more 5 in a row possibilities.
- I initially introduced the activity to the participants as a 'Soft Start" (or "Unofficial Start" if you learned this from Mark Collard). However, I decided to extend play into the entire day. By doing this, participants continued to interact with each other during breaks and lunch. And, allowed for more "Fantastics" to spontaneously erupt.
One last thought about Stories & Connections. I'd like to develop additional handouts with more focused topic (concept) stories like Leadership, Trust, Helping, Relationships, or Preferences. Then, we can be even more intentional about working on group outcomes.
Here you go!
| stories_and_connections_cavert_2024.pdf |
Let us know how it goes – share in the Comment section. Thanks!
All the best,
Chris Cavert, Ed.D.
All the best,
Chris Cavert, Ed.D.


 RSS Feed