

Recently, I've been focusing on finding and developing activities that can be done with multiple groups of eight to 12 participants, simultaneously doing the same activity over a specific amount of time.
Early Learning: Process improvement activities (do the task, for time or a score, problem solve, and do it again with a goal of improvement), and activities that cannot reach the 'end' in the time given (like this one), are good for large group team building (problem-solving) tasks. Activities where one group 'finishes' (completes the task) before other groups can cause logistical/transitional issues we might want to avoid.
This Toss-a-Lot Challenge is a mash-up of 'Up-Chuck' and '7-Up' (Rohnke activities). Once the process is explained, very little facilitation is needed throughout the task. NOTE: This is also a good activity for one group of 10 to 14 as well!
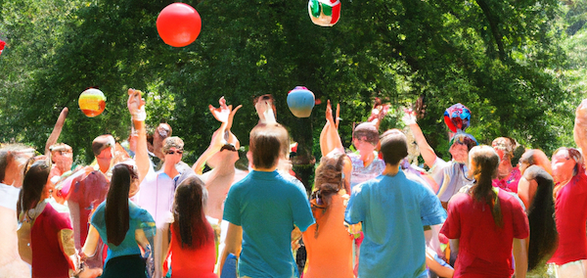
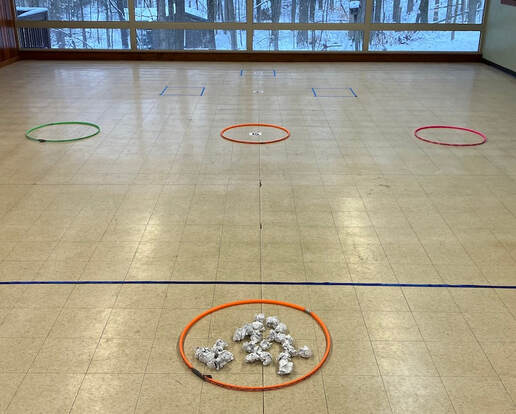
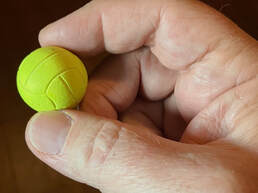
Needs & Numbers: So far, I believe this will work best with groups of 10 to 14 participants. I would go up to six groups at a time – easy enough to walk around to six groups. You'll need one safe tossable item for each person. NOTE: I use the soft 'stress' balls, but I would feel comfortable using tennis balls for this one – focus is more prevalent than chaos as far as I can tell.
Time: I've only done this specific version once – groups had 20 minutes to "see how far" they could get. (I think even in 30 minutes a group of 10 will not be able to complete 10 objects three times in a row. However, maybe some day!)
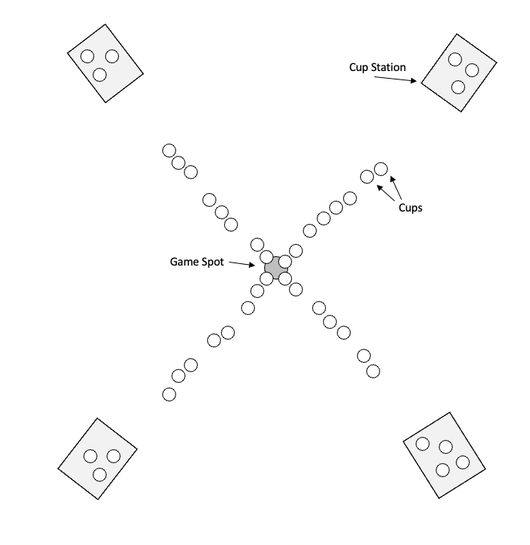
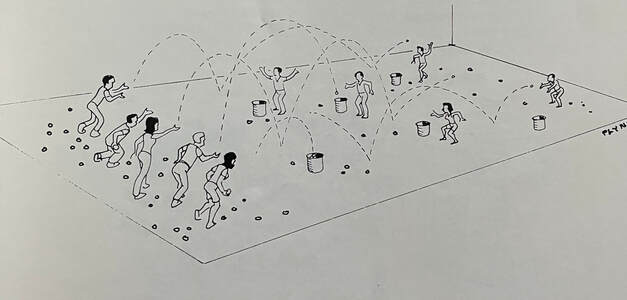
Process: Creatively form up groups of 10 to 14 and distribute the soft tossables – again, each person needs one. Use one group to demonstrate the process. Circle up one group and have all the other groups gather around the demo.
Have the (demo) group circle up, about elbow-to-elbow distance apart, and then place all of their tossables into the center of their circle. Ask one person (e.g., the person with the longest hair) to pick up one of the tossables an then step back to rejoin the circle. Here's a script example:
"Your objective, over the next 20 minutes, is to get as many of your tossable objects into your system as possible. Here's how it works. During each Round, your are required to remain in a circle formation. The tossable objects you have must be tossed, underhanded, and caught three times in a row before another object can be added to your system. An additional limit to your tossing process, the first is being in a circle, the second is tossing underhanded, this third one is that you may not toss to someone next to you – the person on your right and on your left."
"So, let's give this first object a try. The person with the object tosses to someone not next to them." [Let the toss happen.] "If it is caught, this person then tosses to someone else – not to anyone next to them, and not to the person they received it from. This is the fourth limit. Okay, let's go for the second toss." [Let this happen.]
"If the an object drops to the ground, you are required to begin the round again from zero tosses, zero catches. Let's keep going." [Work the group through the one tossable Round – three tosses and catches in a row.]
"Okay, the group has successfully caught one object, three times in a row. Now someone else in the group is invited to pick up another object from the center of the circle. This time, two objects must be tossed, AT THE SAME TIME, three times in a row for this second Round. Here's how it works. When a group is ready – most likely you will be making a plan – anyone in the group says, 'One, Two, Three, Toss!' On the word 'Toss' all objects in play – right now there is two – must be tossed. Yes, it's going to get more challenging. Let's try it." [Work with the demo group to show how the countdown goes and how the process continues or restarts.]
"Part of this activity is about integrity. When 'Toss' is called, all objects must be in the air at the same time. You decide, as a group, if you did that. If not, you must restart the Round. You don't need to go back to one object, you already earned that Round. Just go back to the start of the Round you're on."
"To continue, each Round of your system is the same. Once you toss and catch two items in a row, add a third item. After a third, add a fourth, and so on. Remember, the objective is to get as many objects as you can into your system in 20 minutes."
"Before you all start the challenge, let's review the limits you have:
When questions are address to clear understanding, send groups off to a good place to play in the area (keep groups close together so you don't need to walk around to far). As they get started, be sure to mingle around the groups to clarify any misunderstanding over the task. Keep the groups informed of the time remaining, and keep your ears open for comments that make for good talking points (some examples below).
Variation: Using all sorts of different tossable objects – sizes and shapes – can change the dynamics of the task. A good question: When choosing an object for another Round, what did you consider?
When you're ready to discuss (ie., process) the experience, you can ask one question at a time (ideas below) and let groups talk for a couple minutes, then ask for some good takeaways from the question – popcorn out answers from each group before asking another question.
Talking Points:
Yet another FUNdoing Beta test – let us know how this works for you and how we might change it to bring out more learnings. Leave us a Comment.
Early Learning: Process improvement activities (do the task, for time or a score, problem solve, and do it again with a goal of improvement), and activities that cannot reach the 'end' in the time given (like this one), are good for large group team building (problem-solving) tasks. Activities where one group 'finishes' (completes the task) before other groups can cause logistical/transitional issues we might want to avoid.
This Toss-a-Lot Challenge is a mash-up of 'Up-Chuck' and '7-Up' (Rohnke activities). Once the process is explained, very little facilitation is needed throughout the task. NOTE: This is also a good activity for one group of 10 to 14 as well!
Needs & Numbers: So far, I believe this will work best with groups of 10 to 14 participants. I would go up to six groups at a time – easy enough to walk around to six groups. You'll need one safe tossable item for each person. NOTE: I use the soft 'stress' balls, but I would feel comfortable using tennis balls for this one – focus is more prevalent than chaos as far as I can tell.
Time: I've only done this specific version once – groups had 20 minutes to "see how far" they could get. (I think even in 30 minutes a group of 10 will not be able to complete 10 objects three times in a row. However, maybe some day!)
Process: Creatively form up groups of 10 to 14 and distribute the soft tossables – again, each person needs one. Use one group to demonstrate the process. Circle up one group and have all the other groups gather around the demo.
Have the (demo) group circle up, about elbow-to-elbow distance apart, and then place all of their tossables into the center of their circle. Ask one person (e.g., the person with the longest hair) to pick up one of the tossables an then step back to rejoin the circle. Here's a script example:
"Your objective, over the next 20 minutes, is to get as many of your tossable objects into your system as possible. Here's how it works. During each Round, your are required to remain in a circle formation. The tossable objects you have must be tossed, underhanded, and caught three times in a row before another object can be added to your system. An additional limit to your tossing process, the first is being in a circle, the second is tossing underhanded, this third one is that you may not toss to someone next to you – the person on your right and on your left."
"So, let's give this first object a try. The person with the object tosses to someone not next to them." [Let the toss happen.] "If it is caught, this person then tosses to someone else – not to anyone next to them, and not to the person they received it from. This is the fourth limit. Okay, let's go for the second toss." [Let this happen.]
"If the an object drops to the ground, you are required to begin the round again from zero tosses, zero catches. Let's keep going." [Work the group through the one tossable Round – three tosses and catches in a row.]
"Okay, the group has successfully caught one object, three times in a row. Now someone else in the group is invited to pick up another object from the center of the circle. This time, two objects must be tossed, AT THE SAME TIME, three times in a row for this second Round. Here's how it works. When a group is ready – most likely you will be making a plan – anyone in the group says, 'One, Two, Three, Toss!' On the word 'Toss' all objects in play – right now there is two – must be tossed. Yes, it's going to get more challenging. Let's try it." [Work with the demo group to show how the countdown goes and how the process continues or restarts.]
"Part of this activity is about integrity. When 'Toss' is called, all objects must be in the air at the same time. You decide, as a group, if you did that. If not, you must restart the Round. You don't need to go back to one object, you already earned that Round. Just go back to the start of the Round you're on."
"To continue, each Round of your system is the same. Once you toss and catch two items in a row, add a third item. After a third, add a fourth, and so on. Remember, the objective is to get as many objects as you can into your system in 20 minutes."
"Before you all start the challenge, let's review the limits you have:
- Stay in a circle formation during each Round.
- Tosses must be underhanded.
- Tosses to the person on your left and right are now allowed.
- You may not toss to the person you received the object from.
When questions are address to clear understanding, send groups off to a good place to play in the area (keep groups close together so you don't need to walk around to far). As they get started, be sure to mingle around the groups to clarify any misunderstanding over the task. Keep the groups informed of the time remaining, and keep your ears open for comments that make for good talking points (some examples below).
Variation: Using all sorts of different tossable objects – sizes and shapes – can change the dynamics of the task. A good question: When choosing an object for another Round, what did you consider?
When you're ready to discuss (ie., process) the experience, you can ask one question at a time (ideas below) and let groups talk for a couple minutes, then ask for some good takeaways from the question – popcorn out answers from each group before asking another question.
Talking Points:
- How did you like your planning time – What was good about it? What could have been better?
- How was the communication between group members – What did you notice that worked? What did you notice that didn't work?
- What were some of the things you noticed that were holding you back – things causing some failure?
- What were some of the things you noticed that lead to your success?
- When things 'drop' in your lives and how would you like to handle them?
Yet another FUNdoing Beta test – let us know how this works for you and how we might change it to bring out more learnings. Leave us a Comment.
All the best,
Chris Cavert, Ed.D.
Chris Cavert, Ed.D.


 RSS Feed