FUNdoing - Activities for Team Builders
  • FUNdoing
  • About
  • Blog
  • Resources
  • Books
  • Trainings
  • Ricochet
  • Contact
  • Store

Connections with Stationary Greeting, a Large Group Favorite (No Props, Any Large Group)

8/29/2019

2 Comments

 
Picture

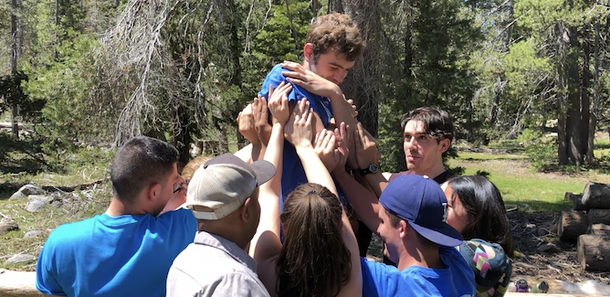
I had the wonderful opportunity to work with a group of 50 6th graders recently (and an amazing team of facilitators). We wanted a quick interactive activity to get them moving and 'connected' with others in the group. I was happy to share my favorite activity under these parameters: 
Stationary Greeting

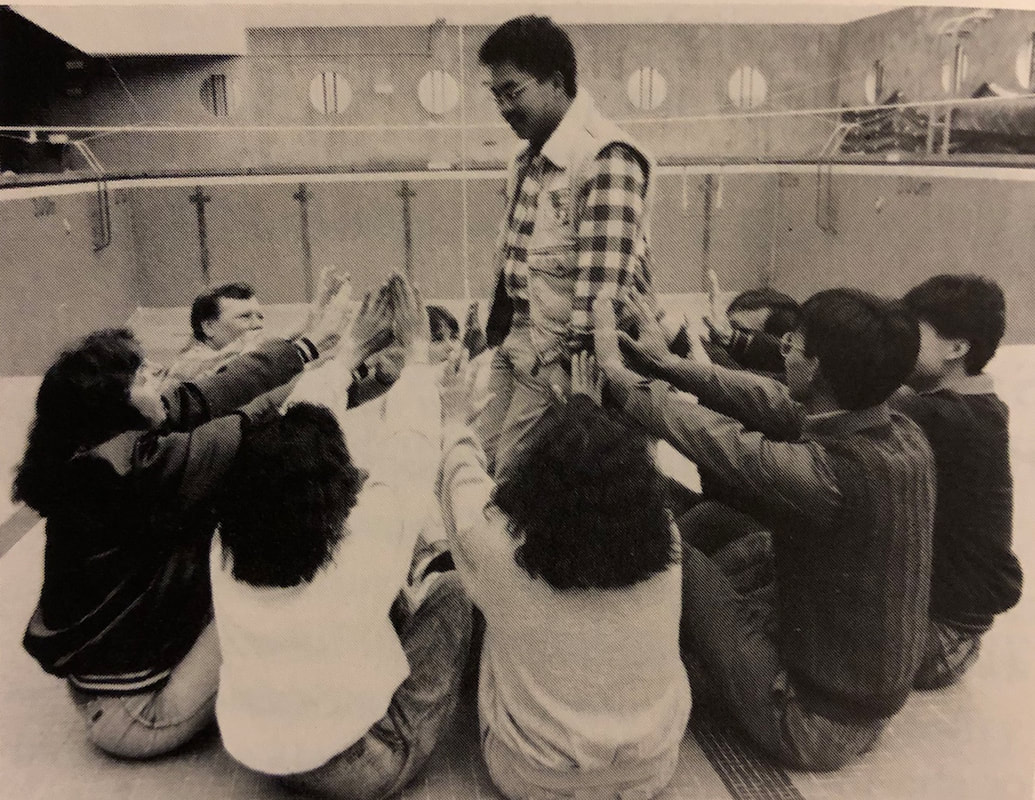
I learned this activity from my friend Mike Spiller. He showed us his version of Stationary Greeting while we were all (over 100 of us) sitting in the bleachers of a school gymnasium. I added the 'pivot' connection for flatter playing areas. 

To set this one up, gather everyone in your BIG group together in a clump - or, I call it, family style. Have them scooch in nice an close together without touching anyone once they have found a place to stand. (NOTE: I like to warn everyone that we'll be close together for a few minutes, so, "if you need a little extra space, position yourself near the outside of the clump.") 


Frontload: Here's how​ I like to frame Stationary Greeting with just about any group: 

"As you can see, my friends, we are close together. In a moment we're going to make some connections with others around us. So, please be mindful of the way you move during the connections. This will be a good time to practice, 'thinking' before 'moving'  - be aware of the others around you. Today, during our program together, we will have a lot of opportunities to think before we move!! Please take care of yourself and others so we can all have the best possible time."

Okay. We're ready to connect! 


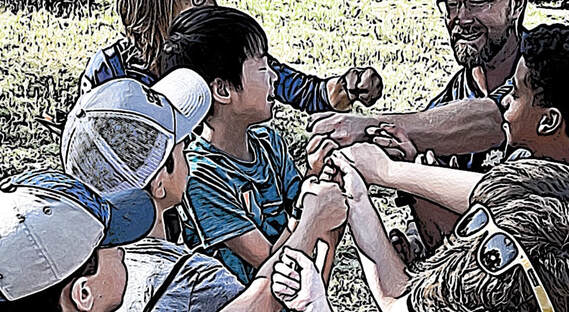
Round 1: "Alright everyone. Here's our first round of connections. Go ahead and have your feet about shoulder width apart. Now plant some roots under your feet into the ground. This is where your feet must stay. For the next 90 seconds, see how many fist bumps you can make with different people around you, one fist bump per person, without moving your feet. Again, it is important to be careful with your movements - be aware of others before you reach out for a fist bump. Do keep track of how many fist bumps you can make because I'll be asking you for your score at the end of the 90 seconds. Ready. Begin.

​5, 4, 3, 2, 1, everyone FREEZE! Okay. Raise your hand if you had more than 10 fist bumps with different people. Keep your hands up until I get to your number. How about 15? 20? 21? 22? 23? Nice job everyone. That's a lot of connections. And, thanks so much for being mindful about your movements. Let's see if we can make some more connections." 

Round 2: "Before we make more connections, you are free, at this time, to move to a different place in the group if this would be more comfortable for you or you think you might want to connect with more people - you might not be standing in the best place to connect with others. If you want to move to a different spot, be respectful of others and find a place you can share with the people around you. Today there will be opportunities to make choices that will help you out and help out your group. So, please speak up if you need help or if you have choices you want to explore.

Okay. Is everyone where they would like to be? Perfect. In this round, you will have one pivot foot - like in basketball. One foot will stay planted in one spot, but you can spin around on this foot. Once you start the connections, you must keep this same pivot foot - no changing pivots. Okay. Let's see how many fist bump connections we can make, with different people, now that we have a pivot foot. Yes. you can fist bump with the same people as you did in the first round. But, not you should be able to get others you could not reach before. 90 seconds. Ready? GO!


​5, 4, 3, 2, 1, everyone FREEZE! Okay. Raise your hand if you had more than 15 fist bumps with different people. Keep your hands up until I get to your number. How about 20? 25? 26? 27? 28? Amazing job everyone. That's a lot of connections. And, thanks again so much for being mindful about your movements - there was a lot more to consider before stepping into the crowd. Let's try one more round." 

​Round 3: "Okay 
friends. This round is simply about connecting with others you have not connected with yet!! Standing right where you are, feet shoulder width apart, you'll be looking around the group for others just out of your reach and make eye contact with them - when you make eye contact, give this person a little wave, say their name if you know it, then look for someone else to eye-connect with. No fist bumps during this round and we're only going to play for 60 seconds - so, get in as many connections as you can. Ready, GO!

5, 4, 3, 2, 1 Freeze! How many more connections did you get? 10? 15? 20? 25? 26? 27? Fabulous. Please remember, let's keep connecting with others in the group today - especially with the people you don't know yet. The more connections we can make, and keep, the stronger we can be together. And, don't forget. Let's remember to think and then move!! Take care of yourself and others. Make it a good day!"
These three rounds take me about 6 minutes. I can get the group to start thinking about some good behaviors for the day and get them moving, stretching and physically connecting with others in the group. Stationary Greeting is a solid opener. 

Have FUN out there my friends!! Keep me posted. 

Chris Cavert, Ed.D. 
2 Comments

Consensus Building with Chiji Cards

8/14/2019

0 Comments

 
Picture

Recently, at a training for some amazing educators, I had another opportunity to work with my Chiji Cards. For me, they are a 'grounding' prop, one that I have been using in impactful ways for over 20 years (they were the first image cards on the scene way-back-when). Now, there are a wide variety of 'image cards' that can be used to build community in all-kindsa ways. (My second favorite set of image cards: Climer Cards.) And, I've seen some homemade image cards that are amazing - just cut out and laminate pictures from magazines and catalogs. (I'm actually working on a print-n-play set of my own - drawing the images on my iPad.) 

After this recent training I was looking through my Chiji Guidebook materials and found this great story from Jennifer Stanchfield of Experiential Tools - Jennifer is an amazing educator, trainer and author working with people all over the world. Here's one of her Chiji stories: 
My favorite ways to use the cards are
group consensus methods.

Jennifer Stanchfield
My favorite ways to use the cards are group consensus methods. This came out of one of those accidental inventions of facilitation that occur when you are confronted with having to adapt your favorite activities to new parameters. I made a major switch in my facilitation approaches when I moved from working with small groups in the therapeutic setting to larger classroom groups in public schools. 
 
I first came across the cards early on in my training career when I was searching out tools and ideas that would help the recreational therapy students I was teaching in my program at the university hospital. I wanted to show them how to become more comfortable with processing.  

The Chiji Cards were introduced in an experiential education magazine as a tool for novice facilitators and Steve Simpson and I connected around that article. [Steve is one of the creators of the cards and the co-author, with me, on, The Chiji Guidebook: A Collection of Experiential Activities and Ideas for Using Chiji Cards]

When I started using the cards with my own groups I found that that they weren’t just a “tool for beginners." As a seasoned facilitator I appreciated the depth of conversation and insight that came out of participant’s connection to the metaphoric images.

 
I used the cards successfully in my small groups of adolescents and family groups at the hospital. Because they had become one of my favorite tools I of course carried them with me to my classroom settings as well. When I moved to these larger groups I couldn’t use them in the same way I had at the hospital, as it was impractical, due to time constraints, for 24 students to pick individual cards and share in a class session. So one day after a group challenge in the physical education classroom I tried spreading out the whole deck of cards on the gym floor and asked the whole group of students to come to agreement on one that represented what they achieved together. 
 
I became hooked on this method after seeing the group drawn in by the cards and treating processing as an engaging group problem rather than “that boring thing you do after the fun activity”, not to mention the rich dialogue that occurred as the students discussed coming to consensus on one card. The student’s shared profound insights about the cards and their connection to the activity/learning as they came to consensus. It was if they were unaware that they were processing.

Since that time this has become my method of choice when using the cards. After an activity/important moment/ end of session, I just ask the group to come to consensus on one card/object that best represent their experience as a group, the strengths of the group, or something they have achieved together.
Thanks Jennifer for sharing your story. How about you? Do you have a favorite activity using image cards? What are your favorite image cards? Leave us a Comment so we can learn together. 

All the best, 

Chris Cavert, Ed.D. 

0 Comments

Willow in the Wind & Lift Off (Levitation) w/Video

8/1/2019

4 Comments

 
Picture

I recently learned this sequenced pair of activities from my good friend Rohan. We were training together out in California - it's so educational for me to get to see other amazing facilitators at work. I learn so much from them. Down a bit in this post I share how Rohan specifically facilitates Lift Off. First, let's explore the activity, Willow in the Wind. 

Willow in the Wind 
Early on in my team builder career, I took a number of Project Adventure workshops. Part of their trainings always included "Trust" sequencing. Willow in the Wind, a "trust-pass exercise" was used "as a warm-up activity for the more dramatic falling sequence of The Trust Fall" (Cowstails & Cobras II, Rohnke, 1989). Willow in the Wind is now more than just a precursor to Trust Falls. I use it a lot when practicing spotting for wired low-element events or providing a "trust building" or low-to-the-ground "risk taking" activity. I've seen some incredible break-throughs during Willow in the Wind. Okay. So how does it work? 

Going to my shelves, the earliest write up I could find is in the, More New Games book (1981) from the New Games Foundation. For historical purposes, I want to share their original description : 

We form a small circle of about eight players standing shoulder to shoulder and facing the center of the circle with hands held at chest height, plans forward [will a bend at the elbows for flexing and extending]. Each of us should have one foot slightly behind the other for good balance [and a little bend in the knees]. We've just transformed ourselves into a summer breeze, and now all we need is a volunteer to be the willow. [I love this last line - ever been transformed into a summer breeze?]


The willow stands in the center of the circle with her feet together, her arms crossed over her chest, and her eyes closed [closing eyes is, of course, optional]. Keeping her feet stationary and her body straight but relaxed, she lets herself go, swaying from side to side, forward and back. Those of us in the circle support her with gentle pushes of our palms and provide summer-breeze sound effects. [Oh, I love this too - I'm adding the sound effects into my Willow in the Wind!] We should make sure that there are at least two people supporting the willow at all times [I like to say, "four hands on the willow at all times"], and that our gentle breeze does not become a howling hurricane. 

In turn, each of us gets to be the willow in the wind, swaying to and fro, caressed by the breeze. This is a trust game. The player who is the willow gets the opportunity to trust the other players completely, and those of us who are the breeze get to feel the trust the willow has placed in us. 

Such an elegant description - it makes me want to get a group together and try it right now! Along with the handful of additions, the description above is pretty much how I set up Willow in the Wind. Then, my role, walking around the outside of the circle, is to keep eyes and ears on the group to make sure they are being a gentle, supportive breeze. That's Willow in the Wind. 
A Historical Aside
​In the book, Cowstails & Corbers II (1989), Karl Rohnke shares a "second [willow in the wind] trust-pass sequence." I have never tried this one, but it looks pretty cool. Here's Karl's description:

The circumference people sit down so that they are arranged hip to hip: i.e., closely scooched together. With the center person already set in a standing position (as seen in the picture from the book), the circle people all put their feet on top of the [willow's] feet, locking that person in place. ​
Picture
This is done not to insure the positive participation of that person, but to provide a firm base of the swaying 'willow.' The central person initiates movement from side to side [forward and back] and is consistently and compassionately [gentle breeze] redirected by the sitting catchers. It is important that the catchers keep their hands up in anticipation of the [willow's] body unexpectedly heading in their direction. 

DO NOT LEAD THIS ACTIVITY - this is my advise to you: Making an educated guess here, the reason I have never seen this done in the wild is that it's up there on the risk scale (standing spots do not lessen the experience, so why not stand) - facilitators discovered this early on. The sitting circle of players all need amazing core strength and their heads are now under a fall potential, which is not the best practice. I share this one to give you some historical perspective and a means to consider some particular safety issues we are aware of in the field - if an inherent risk can be mitigated, why not? And, there are some low elements still used today where craniums are under fall potential. These are among the program choices we make. 
Willow in the Wind & Lift Off
When facilitating this paired sequence, Rohan instructs each group in play to have a lead. This lead will be directing the steps of the process. The center participant will be facing the lead standing in the circle (you will see this in the video). When going through spotting commands, the lead checks each step and signals the spotters to respond. For example, when the willow (center participant) asks, "Spotters Ready?" the lead looks around the circle, checks readiness, then counts down, "3, 2, 1" and all respond, "READY!" [I really like how this lead brings unity  to the process.] Then, when the willow says, "Falling!" the lead looks around for readiness one more time, then instructs the willow to, "Fall on." The willow will then be gently guided around the circle for about a minute, then the lead instructs the group to center the willow in place. 


Now for the Lift Off. It's very important, during the introduction of this paired sequence, to let everyone know there will be a great deal of pressure placed on the upper body/shoulders of the one being lifted. So, if anyone is concerned about injury to this part of their body, they should not be lifted. And, when being lifted, they want to be lowered, they simply say, "Bring me down." On to the lift. 

The lead will first ask the willow if s/he wants to be lifted. If yes, the lead asked the spotters to put hands on the willow. Hands are placed on the arms and upper back, under the shoulder blades of the willow. The lead then instructs the spotters to press, "In, In, In, In" until the lead feels like there is equal pressure around the willow (you don't want the willow to be pushed off to one side). The lead then says, "Up, Up, Up, Up" instructing the spotters to push up on the willow to the hight of the shortest person's reach. Finally, at maximum height, the lead says, "Down, Down, Down, Down" until the willow's feet are safely back on the ground. This "In, Up, Down" sequence is done smoothly without pause. Before the spotters "let loose" of the willow, the lead checks in to make sure s/he is stable. Then, high fives all around. This process is slow and steady with loud and clear communication. 

Rotate other willows into the circle and change leads so there is an opportunity for participants to experience the different roles in the process. As facilitators, it is our role (job) to be mindful of the needs of our group - and the individuals within the group. Everyone is an important part of the process, even if they are not lifted. 
Let me know how the gentle breezes and flights go for you! Leave a Comment so we can learn together. 

Chris Cavert, Ed.D. 

​P.S. Thanks again Rohan! It was great learning from you my friend. 

4 Comments
    Picture
    Find Out More Here

    JOIN
    FUNdoing
    Fridays
    Team Building Activities sent to your email every two weeks! 
    Picture
    FREE Processing Activity just for signing up! 

    Picture
    Processing for Beginners
    FREE Mini-Course

    Click for Information

    Some Team Building Tools at the STORE! 
    Picture


    Details & Purchase
    Picture
    Details & Purchase
    Picture
    Details & Purchase

    Blog Author

    Dr. Chris Cavert is an internationally known author, speaker, and trainer in the area of adventure-based activity programming and its relation to community and pro-social behavior development.

    Blog Purpose

    This blog is a space for hands-on programable fun - energetic activities and ideas that can be used as a means to bring people together; activities and ideas we as educators can add to our social development curriculums. 

    Categories

    All
    Activities
    A Files
    A-Files
    Challenge Course
    Chiji Cards
    CUP Activities
    Ed Tech 4 Adv Ed
    Facilitation
    Fun Props
    Lessons
    Let's Talk About
    List Play
    Noodles
    On Pedagogy
    Print N Play
    Processing
    Programming
    Puzzles
    Read This
    Repurposed
    Resources
    Small Group Activities
    Tools For Team Builders
    Top 10 Activities
    Variations
    Videos
    Virtual
    What? & Why?

    Archives

    March 2023
    February 2023
    January 2023
    May 2022
    April 2022
    March 2022
    February 2022
    January 2022
    December 2021
    November 2021
    October 2021
    September 2021
    August 2021
    July 2021
    June 2021
    May 2021
    April 2021
    March 2021
    February 2021
    January 2021
    December 2020
    November 2020
    October 2020
    September 2020
    August 2020
    July 2020
    June 2020
    May 2020
    April 2020
    March 2020
    February 2020
    January 2020
    November 2019
    October 2019
    September 2019
    August 2019
    July 2019
    June 2019
    May 2019
    April 2019
    March 2019
    February 2019
    January 2019
    December 2018
    November 2018
    October 2018
    September 2018
    August 2018
    July 2018
    June 2018
    May 2018
    April 2018
    March 2018
    February 2018
    January 2018
    December 2017
    November 2017
    September 2017
    August 2017
    July 2017
    June 2017
    May 2017
    April 2017
    March 2017
    February 2017
    January 2017
    December 2016
    November 2016
    October 2016
    September 2016
    August 2016
    July 2016
    June 2016
    May 2016
    April 2016
    March 2016
    February 2016
    December 2015
    November 2015
    October 2015
    September 2015
    August 2015
    July 2015
    May 2015
    April 2015
    March 2015
    February 2015
    January 2015
    December 2014
    November 2014
    October 2014
    September 2014
    August 2014
    July 2014
    June 2014
    May 2014
    April 2014
    March 2014
    February 2014
    January 2014
    December 2013
    November 2013
    October 2013
    September 2013
    August 2013
    July 2013
    June 2013
    May 2013
    April 2013
    March 2013
    February 2013
    January 2013
    December 2012
    November 2012
    October 2012
    September 2012
    August 2012
    July 2012
    June 2012

    RSS Feed

Proudly powered by Weebly