FUNdoing - Activities for Team Builders
  • FUNdoing
  • About
  • Blog
  • Resources
  • Books
  • Trainings
  • Ricochet
  • Contact
  • Store

Re-Build It (with Cups)

7/9/2026

0 Comments

 
Picture
AI Generated Image
Here's a Cup activity thought I had tucked away in my "Ideas" folder. It's a 'less-to-more' challenging progression with lots of action and designated time for planning before each challenge. So, there will be lots of talking point options. 

I like it for groups of 5 or 6 participants, and a group does not move to the next level of challenge until they are ready – which they determine by consensus. 

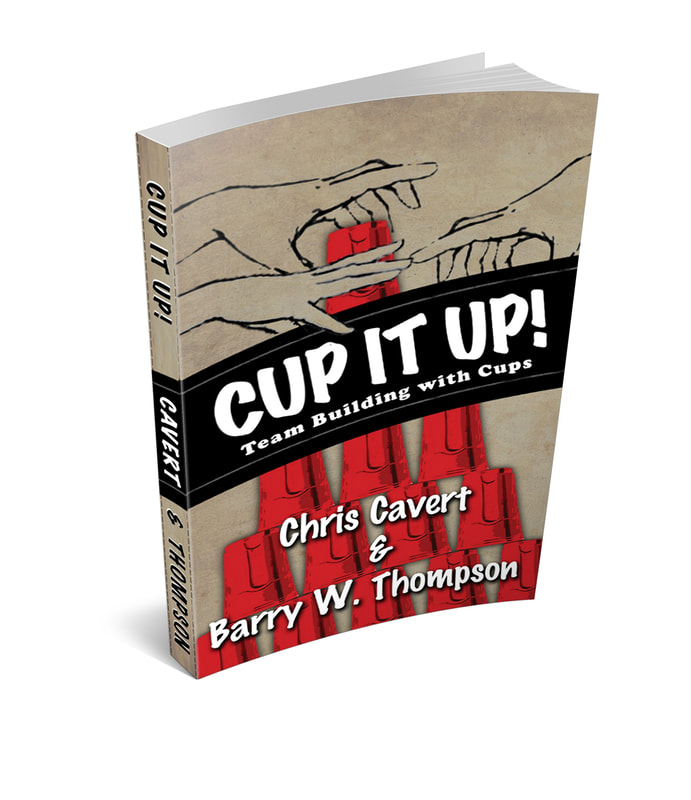
​Needs & Numbers: You'll need 12 plastic cups for each group of 5 or 6 participants. I will use this activity with up to 48 people – keeping the groups close enough together so I can walk around and observe. (Multiple groups can play at the same time.) We do like the square bottom cups from Solo – the cup of choice for the activities in Cup It Up: Team Building with Cups (Cavert & Thompson). Ebook download at the FUNdoing Store).

You will also need one Re-Build It Instructions sheet and a pen for each group and a flat building surface for each group. I share some surface options below with some tactical reasoning – less-to-more challenging. Solid surfaces like desktops, tabletops or tile/wood floors are better than carpet which has some 'give' to it, making taller towers more difficult to stand. 
Here are some possible building surfaces and their considerations: 
Picture
Use a solid ground-level surface or solid floor. 

Some groups will have an easier time than others working from the floor. And players can be all around the cups. 
Working off of a small stool will keep players off the ground and still have room to build a 12-Cup tower.

Players can move all around the cup tower.

Picture
Picture
Small tables with a group at each end. 

Players can be around the tower but now there is the risk of bumping the table, disrupting both groups. This is another factor to consider when sharing a resource. 
Picture
Picture
Picture
Two groups at Rounds where they will need to navigate less space around the cup tower and risk bumping the table – disrupting both groups. Then there can be four groups using a long conference table (AI Image). At each corner there will be some good access around each cup tower, but now a bump of the table will disrupt four working groups. Building surface choices all come with their own consequences. And good things to talk about. 
Process: Creatively divide your big group into smaller groups of 5 or 6 participants and invite them to stand near their own building surface (see ideas below). If the gear for each group is not already placed at the designated building surfaces, have someone from each group pick up a stack of 12 cups, the Re-Build It Instructions handout, and a pen for their group. 

When all the groups have their gear, give everyone time to read the Re-Build It Instructions (below) – one person from each group reads the Instructions and the Rules out loud to their group. After it appears all groups have heard the directions, get everyone's attention for some questions and answers.

Re-Build It Instructions (as provided on the downloadable Handout below)

There will be 7 Re-Build Challenge opportunities during the activity. Each Challenge Round will consist of a 3-minute planning and practice period and a 1-minute Re-Building period. Cups may be touched during the planning and practice period. 

Before each 1-minute Re-Building period the single-row cup tower needed for the next Re-Build must be standing on its own (no one touching it) on the group's building surface before time starts. Cups in this starting tower may not be nested inside of each other. 
​
Rules: 
  1. When "GO!" is called, and time starts, the standing tower cups may be touched. (Extra cups are off to the side.)  
  2. Each person in a group must place at least one cup into the Re-Build. No one can place a second cup into the Re-Build until everyone has placed their first cup. 
  3. The Re-Build must consist of each starting tower cup reorientated 180 degrees. For example, if the first cup at the bottom is positioned with the open end down, this first cup in the Re-Build must be placed open end up. The remaining cups are then placed accordingly. 
  4. Cups may not be nested inside of each other during the Re-Build. 
  5. A successful attempt is made when the single-row of cups Re-Build is standing on its own at the end of the 1-minute building period.
  6. After a successful Re-Build the group can move to the next Re-Build Challenge. 
Re-Build Challenges:
Challenge 1: Re-Build a 6-Cup Tower
Challenge 2: Re-Build a 7-Cup Tower
Challenge 3: Re-Build an 8-Cup Tower
Challenge 4: Re-Build a 9-Cup Tower
Challenge 5: Re-Build a 10-Cup Tower
Challenge 6: Re-Build an 11-Cup Tower
​Challenge 7: Re-Build a 12-Cup Tower
rebuildit_instruction_handout.pdf
File Size: 323 kb
File Type: pdf
Download File

After Questions and Answers have been processed, give the groups their first time-budget cycle. Tell them, "You now have 3 minutes to plan and practice Challenge 1. Re-Build a 6-Cup Tower. I will remind you, with enough time, to get your 6-Cup tower set up before the 1-minute time starts for the Re-Build."

Then, start the 3-minute time window for planning and practice. Provide the time remaining every 30 seconds – "90 seconds." "60 seconds." "30 seconds. You should consider setting up your 6-Cup tower so you are ready for the start of the Re-Build." 

IMPORTANT! As soon as the 3-minute planning and practice time is up, start the Re-Build time. You will give groups a countdown with 10 seconds remaining in the planning and practice time: "10, 9, 8, 7, 6, 5, 4, 3, 2, 1. Start your Re-Build!" Then provide time checks every 15 seconds ending with a 10 second countdown.

After the first Re-Build Challenge, check in with everyone to gauge understanding. If there are groups who were unable to end with a standing 6-Cup tower, they will attempt 6 cups again. Those with a 6-Cup tower standing will add another cup to their resources and prepare for a 7-Cup Re-Build. Yes. Someone in the group will need to manage two cups – following Rule 2. As the Challenges progress, more people in the group will need to manage more than one cup. 

After every Round, check for understanding before starting the time budget cycle.  
Facilitator Notes:
  • Consider the Rules carefully. Be sure, referencing the 'Rules' to a group, you are helping the groups understand the Challenges. And be open to creative solutions to a problem. For example, is knocking over the initial standing tower against the Rules? As long as the cups get Re-Built with each cup in the alternate orientation (the key is the bottom cup being turned), then knocking down may not be a bad idea (but we let them figure this out). 
  • Of course, manage time as you see fit. You might want to take more time to discuss moments in between Challenges. It's about the learning opportunities – take them when they present themselves. 
  • You could take the time to share "best practices" between groups. Each group is working through the same problems. What would helping each other do for the community? The tide rises all boats. 
Possible Talking Points:
  • What were some of the decisions you had to make during the planning sessions? 
  • How did you use the time during your planning and practice sessions? Is/was there a different way you could have used your time? 
  • How did the 'time budget' influence the way you interacted during the planning and Re-Build challenges? How does 'time' in your life influence the way you interact with others during day-to-day experiences? In what ways would you like to change your interactions no matter the time? 
  • Were you clear about the role you had for each Re-Build Challenge? When was your role clear to you? Did you choose your role, or did someone choose it for you? How did you feel about your role? Did you question your role? Did you want to question your role? 
  • What was against you during the challenges? What did you do to manage the things against you? How did you 'handle' the things against you? 
  • If your tower fell, what was your reaction? Then, what was your ACTION? 
  • How did your group react to someone from another group causing your tower to fall? What are some good ways to handle a situation like this? 
  • How did you feel about redoing a failed challenge? What behaviors did you notice in your group when you were faced with redoing a challenge? What other behavioral options were there? How do you define a 'redo?'
  • What was it like for you to place more than one cup into the Re-Build? Did you 'volunteer' to manage more than one cup, or were you forced? Expected? What prevented you from sharing your concern for managing more than one cup? How did being forced to manage more than one cup influence the way you participated in the Re-Build? What would you like to see change about a situation like this? 
  • Once you placed your cup, or cups, what did you do? Were you helpful? In what ways? 
We're in Beta Testing mode, so please let me know if you have ideas that will make this experience more meaningful! 

All the best, 

Chris Cavert, Ed.D. 
0 Comments

Trackball Challenge: A Self-Guided Process Suitable for Groups of 24 to 80 Participants (Printable Instructions)

6/26/2026

0 Comments

 
Picture

I recently worked with a group of 72 adults who were a part a student support department at a University. Their mission statement included: "To support students from pre-college through graduate education." One of their desired outcomes for the professional development day was to explore the concept of 'support.' During my planning process I came up with Trackball as a way to experience and discuss support. Let me walk you through my process...

Set Up:
Picture
I used 5-foot lengths of rope (tied into circles) for the Pods and golf balls for the participants. You could also use Hula Hoops for the Pods and Tennis Balls for participants – really, anything that rolls. Maybe there are different 'kinds' of participants you want to talk about. They can be represented by marbles, golf balls, and tennis balls – maybe even a few softballs. 
Picture
I used a collapsible grocery basket for the Realm of Their Future. I like the portability of this container. You can use a bucket or box as well. I used to use another rope circle for the destination point for materials, but the orbs often bounced out of the circle (of course another problem to solve). I'm purposefully increasing the odds of success using a container with walls. 
Picture
Needs & Numbers: As for the set up, use the same gear (and Set Up) for 24 all the way up to 80 participants. (With the time allowed, it will not be about getting ALL the participants into the Realm of Their Future. It will be about how many they can get there in the time they have.) 

You'll also need one 'Track' for each person in play. Any 'Pipeline' prop you have will work. I used the colorful 'Gutter Ball' kit from Training Wheels (see the Track picture in the heading). You can even use foam pool noodles cut into 18-inch sections. 

Each initial 'team' within the 'group' will need a copy of the Trackball Self-Guided Instructions. I also like to provide a clipboard and a pen for each team if I'm going to have them self-reflect using the guide on the back of the Instructions. 
trackball_selfguided_instructions.pdf
File Size: 451 kb
File Type: pdf
Download File

This PDF will show you a Preview before you click to download.
Process: Divide your group (of 24 to 80 participants) into smaller 'teams' of 6 to 10 people. With my group of 72 I handed out playing cards at the beginning of the program so I could get them into a variety of group sizes during our training. (Check out THIS VIDEO/Blog post on Card Groupings.) 

After I divided them into teams (using cards – 8 or 9 on a team), I asked everyone to send me one person from their team to pick up the gear they needed. They picked up a Track for each person on their team (including themselves), one Self-Guided Instruction Sheet, a clipboard and a pen. 

Before we started, I got everyone's attention using my trusty cowbell. I told them this:

"You now have what you need to begin the next adventure. Have someone on your team read out load the Instructions for the task. Wave your hands around for me to see if you have something I can clarify for you.

For your Time Budget, you have 10 minutes to plan and practice your approach and then 20 minutes to work your plan moving participants to the Realm of Their Future. Please keep in mind, you are one service provider divided into teams to meet the Objective. 

When your Time Budget is up, you will spend some time exploring the ways you supported the participants, and each other, during the experience.
Your 10 minutes of planning and practice starts now. I'll let you know when to begin the official movement of participants to the Realm of Their Future. Go ahead and share the Instructions with each other and let me know if I can clarify anything for you."
Facilitation Notes: At the conclusion of my instructions, I let the teams work out their process. I walked around making myself available for questions and clarifications. I also kept an eye on Instructions violations – clarifying the expectations. 

BIG NOTE: Many people started to plan and practice without a clear understanding of the Instructions. (This was a great talking point after the activity.) 

Here are several things I needed to clarify right away: 
  • Each person can only use and touch one track.
  • 'Participants' can only be touched by the tracks (many were confused about how to get participants out of their Pod – a problem to solve).
  • They are "one service provider" divided into teams, not competing against each other. In other words, they are ONE GROUP working towards the Objective. 
After starting in smaller teams here's what was suggested. In the end they moved 11 participants in 20 minutes and felt good (as they shared) about this ALL-Group bonding experience. 
Picture
Reflection: After the Time Budget was up, I asked them to rejoin their original teams and discuss the question regarding 'support' that was found on the back of their self-guided Instructions. After about 6 minutes I asked teams to share out the supportive behaviors they noticed. Together there were over 15 supportive behaviors they shared. Then I asked this group, "What are some of the supportive behaviors you saw here would you like to see more of in this group?" This opened some awareness to what they can work on as they moved forward together. 

Here is the Post-Activity Reflection Question and 15-point spaces to document observations that was printed on the back of the Instructions sheet: 
supportive_postactivityreflection.pdf
File Size: 25 kb
File Type: pdf
Download File

This PDF will show you a Preview before you click to download.
I have found over time with larger groups, the self-guide Reflection gives more people an opportunity to share their thoughts. And, when they all write down what was shared, I can collect this data, type it up, and send it to the group for future reference. It's a nice value-added to a program. 

Let me your thoughts about this one. Leave us a Comment or send me an email. I'd love to know how it works out or how it can be improved. 

All the best, 

Chris Cavert, Ed.D. 
0 Comments

Word Circle Puzzles and 'Collaborative What's Missing' Variation: May 2026 (Print-N-Play)

5/29/2026

0 Comments

 
Picture

It's been a while since I've posted new Word Circle Puzzles. So here you go:

Note: You'll get a preview of the PDF before you click to download.

fdblog_wcp_setd_may26.pdf
File Size: 259 kb
File Type: pdf
Download File

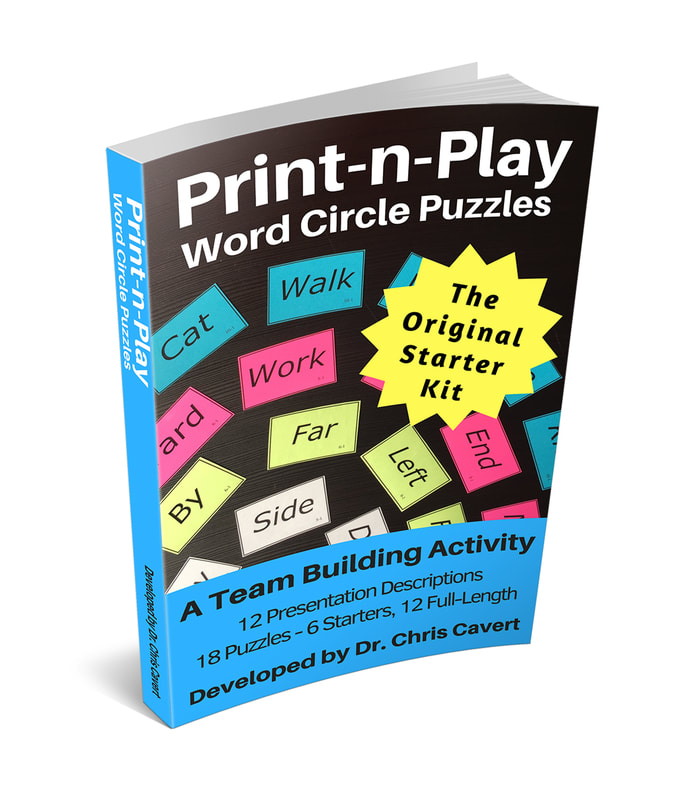
If you are new to Word Circle Puzzles, a cognitive team building activity, pick up the 'Word Circle Puzzles Starter Kit' (immediate download) at the FUNdoing Store. The Kit includes comprehensive information about the puzzles, lots of print-n-play puzzles, and 12 different ways to use them with your groups.

You can also find the 'WCP Expansion Pack' and Volume 1 of the advanced 'Picture Word Circle Puzzles'. (Go to this FUNdoing Post to find out my favorite way to use Picture Word Circle Puzzles – including one FREE puzzle.) 

Here's a quick overview, using the 'Collaborative What's Missing' variation:

Needs & Numbers: One Word Circle Puzzle for every 3 to 4 participants. (There are a few different ways to use WCP with groups, detailed in the Starter Kit. Multiple small groups in play at the same time in one way.) You will also need 1 'Help Card' for each group (included in the print-n-play) and some index card and markers. 

Set Up: Have one word circle puzzle ready for each group you intend to form (e.g., 20 people in your group, you plan to form groups of four – so you need five puzzles and five Help Cards). Use the same puzzle for each group. NOTE: The longer the puzzle, the more time is usually takes. 

Then, from each puzzle, take out one word card – take out a different word from each puzzle. 

After forming groups and assigning each a spot to work on their puzzle, hand each group a puzzle, one Help Card, one blank index card and a marker. 

Activity Objective: Connect all the word cards provided and then determine what one word is missing to complete the puzzle so all the word cards form a circle. 

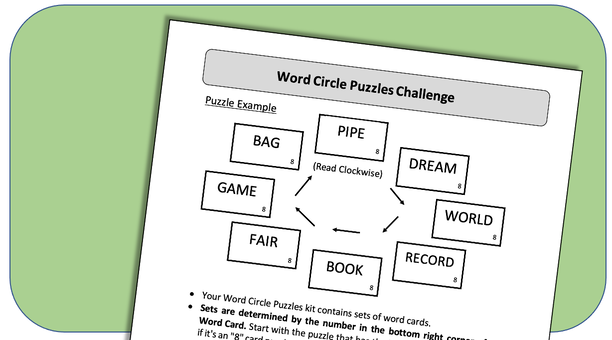
​Here's an example of a 6 Word Circle Puzzle:
Picture
Each word of a puzzle is connected to the 'next' word in the circle – reading clockwise, or moving to the right. The process can be explained like this: Each word in a puzzle has it's own definition. When combined with another word the two words together have a different definition. The puzzle above includes the words or phrases manpower, power plant, plant food, food chain, chain mail, and mailman. 

​Process: After sharing the Activity Objective (above), provide a solved  example of a puzzle – use the one 6 word puzzle above, writing the words on index cards and laying them out in correct order (with some help from the group), so they get the destination they are heading. 

Then explain their task is to initially put all the words they have in correct order – this could forming a circle of words or simply setting the word cards down in a straight line. Then, they will need to determine what word can be used to connect the two ends together. They use the blank index card and marker to write their word and place it in the sequence. 

Help Cards: Each group has one Help Card (if there are only three groups in play, give each group two Help Cards). They can be used by a group to ask you a question. Frame it in this way:

"You'll notice you have a Help Card. You can use it to ask me a question about your puzzle. Now, keep this in mind. You can ask me a question, but I am not obligated to answer it. For example, if you ask me, 'What is the missing word in our puzzle?' I will choose not to answer this question because it solves the objective – too easy. Questions that help you along your journey I'm more prone to answer." 

Getting to Work: Clarify any questions the groups have about the Activity Objective or the rules. The main rule is that all word cards must be used. Then, let them get to work. 

Play until the first group discovers their missing word. Then, give all other groups one extra minute to discover their missing word. After that last minute, bring everyone together for a Reflection session (see, Possible Reflection Questions below). 

Facilitated Objective: This version of Word Circle Puzzles (Collaborative What's Missing) has, at least, two built in opportunities for collaboration. The first are Help Cards. If the groups come together and agree on what to ask the facilitator, they don't 'waste' questions. Most groups don't collaborate and end up asking facilitators the same questions. The second is discovering missing words. If they come to realize they are working on the same puzzle, other groups will have the missing word a group is looking for. 

Fact: The puzzle does not even need to be solved. Each group just needs to find their missing word. When all groups have all the same words, the Activity Objective has been met. 

Facilitator Note: Don't tell the groups the name of this activity. Using the word 'collaborative' can solve a key problem for them – we want them to figure it out, or talk about it during the reflection. 

Possible Reflection Questions: 
  • What was the most challenging part of this puzzle for you? 
  • How many Help Cards did you have? How many Help Card were available to the entire group?
  • How did you use the Help Cards? Is there another way you could have used your help cards? 
  • Did you realize each group was working on the same puzzle? When did you realize you were all working on the same puzzle – how did you find out? 
  • Was collaboration against the rules? What was your objective? In what way could collaboration have helped you meet your objective? 
  • What are some reasons for not collaborating with others? What are some of the benefits of collaborating with others? 

Use the Search feature (above) – type in: 'Word Circle Puzzles'. You'll find TONS of puzzles inside the FUNdoing Blog and several presentation variations. 

Don't forget, EVERYTHING you need to know about Word Circle Puzzles, and lots of puzzles sets, can be found in the WCP Starter Kit.  

Have FUN out there!! 

Chris Cavert, Ed.D. 
0 Comments

Phraseology Cards, Set 2 (Print-N-Play)

1/15/2026

0 Comments

 
Picture

First and Foremost, Happy New Year! I hope your 2026 adventures are memorable. 

Back in 2019 Phraseology Cards were introduced. I use them regualrly to spark thinking, meaning, and creativey. And I've heard from other team builders who love them just as much as I do. If you are new to Phraseology Cards please head over to the ORIGINAL POST for the main details about leading the activity and to download Set 1. (FYI: The original download, and the download included here, are almost the same – other than the phrases themselves.)

You can now use either Set, or combine the two for additional talking points. Here's what I share in this second download: 


Using Both Sets Together When setting up the activity and counting out your card/phrase needs, include an equal number of phrases from both Sets – with the understanding that each Set of cards is a different color (e.g., Set 1 is yellow, Set 2 is green). During ‘phrasing’ ask participants to only pair up with card colors that are the same (‘sameness’). Share meanings when matches are found. Then, during Re-Phrasing, ask participants to pair up with a different colored card and share meanings when discovered. One talking point can be about diversity – stepping out of sameness can be beneficial, providing opportunities that are not possible if we don’t. 

​Your new Set:


Phraseology Cards, Set 2 (Thers is a preview first before you choose to download.)
phraseologycards_set2.pdf
File Size: 516 kb
File Type: pdf
Download File

Please let us know how this second Set influences your Phraseology Experience. Leave us a Comment. 

All the best, 

Chris Cavert, Ed.D. 

0 Comments

The Best of 2025

12/25/2025

0 Comments

 
Picture

It's time again for the reveal of the FUNdoing Blog posts that have garnered the most views in 2025. Here are the top 3 and another one (recently posted) I'm really excited about exploring more in 2026.

Relationship & Trust Building Cards (Print-N-Play) This post (and resource) was overwhelmingly the most viewed. Facilitators shared with me that the activity was easy to lead and it quickly revealed trusting behavior preferences within the group – opening the door to important conversations. 

Human Square I didn't get any feedback on this one other than the view count. Like me, I will guess, we like this one  because it's a great no-prop activity, easy to lead with groups of 12 to 30 people. And it has a variety of learning opportunities. Groups, among other concepts, can work on communication behaviors, leadership skills, and trust building. 


Figuratively Speaking Conversation Cards (Print-N-Play) It's no surprise another print-n-play made the list (accessible resources are FUNdoing favorites). I used my set of cards all year – I just kept picking cards that landed on thoughts I needed to focus on in the moment. (This was my top pick, most used activity, of the year.)

Grouplets RPS I'm giving this activity the 'most potential' award of the year. I posted it in November, so it doesn't have much traction yet, but I think it will pick up. For a while now I've been exploring the metaphor of 'How we play the game?'. It helps groups move into the connection (discussion) of how we play the game of 'life'. I've been a part of some very interesting discussions on the topic and I want to keep using the idea with different activities like this one as well. 
Thank you for joining the FUNdoing adventures in 2025. As I still do, I'm looking forward to more...

All the best, 

Chris Cavert, Ed.D. 
0 Comments

52 by 4: Team Sheet for Large Groups with Playing Cards (Print-N-Play)

11/27/2025

0 Comments

 
Picture

I'm often asked about 'team building' activities for larger groups. Facilitators, from what I have encountered, ease into large group work with connection activities (e.g., pair-and-shares, handshakes, and small group discussions) and then work their way into more complex problem-solving tasks. But, what kinds of tasks and how do we process these large group experiences? 

Sam Sikes, Faith Evans and I wrote a book (The More The Merrier) about the complexities of the large group experience – how to prepare, activities that work (over 100), and how to process for useful take-aways. I want to share a team building activity from the book we call a Team Sheet.

When working with large groups aimed at outcomes related to group dynamics, problem-solving and specific concepts like effective communication and leadership, we form smaller groups of various sizes and give all the groups the same task. (There is also the 'rotate to different stations' method). One of the logistical considerations with this approach is timing – what happens when some groups finish before others? Team Sheets are one solution to this concern. 
You will get a printable 'preview' of this document before you choose to download it.
52by4_tmtmteamsheet_cavert.pdf
File Size: 476 kb
File Type: pdf
Download File

The 'Team Sheet' given to the participants is the last two pages of this document printed back-to-back.
Team Sheet Logistics

Here's the snapshot of how it works (there are more specifics in the book). In 52 by 4 the large group is creatively divided into teams of four or five people. Each team chooses a 'representative' that will attend a quick training about the activity. Then the facilitator announces a 'group discussion' question each team will discuss while the representative is at the training. The representatives are then invited to the training with the facilitator as the teams start discussing the question. With the representatives, the facilitator provides a quick overview of the expectations detailed in the Team Sheet, answers questions, and then provides the representatives with all the materials they need to bring back to their teams and the time-budget for the team sheet activity. (This should take about four minutes.)

Discussion Questions: Connection types of questions can be asked for teams to discuss or a question related to a Team Sheet focused concept can be used to frontload the participant-centered reflection after the activity. In 52 by 4, Planning and Leadership are the two focused concepts. Other Team Sheet concepts include Challenge, Integrity, Success, Perception, Risk, Change and others. (There are eight more Team Sheets in the book.) 

Team Sheet Play 

Once the representatives return to their teams, the allotted time-budget starts. For 52 by 4 the time budget is typically 15 minutes. This means all groups have a 15-minute window to learn, plan, practice (optional), and perform the task. As you can see in the (bottom half of the) Team Sheet above, there is data space for seven attempts at the task (and teams can make more attempts if there is still time left in the budget). The idea is for the groups to work out 'problems' through each attempt in order to complete the task as quickly as possible. 

The facilitators role during this time is to mingle around throughout the groups and answer clarifying questions – without solving problems. 

When the time-budget expires, direct the group to turn over their Team Sheet and discuss the processing questions. You can limit their discussion to one of the two concepts or both. The 52 by 4 concepts are 'planning' and 'leadership'.

Provide a time-budget for this processing experience as well – 10 to 15 minutes for one concept and up to 20 minutes if you want them to work through the questions for both. Say something like, "You have about 15 minutes to discuss the leadership questions before we come back together as a whole group to share some insights." (If all teams are still dialed into their discussions, give them more time.)   

During this participant-centered processing session, mingle around the groups. Drop in to listen to some of the discussions with a few groups to pick up some connections/learnings you can bring up during the 10-minute all-group session where participants share some main insights from their experiences. 

Team Sheets Summary Overview
  • The larger group is divided into smaller groups (5 minutes).
  • Groups choose a representative to attend training (1 min). 
  • Groups are provide with a discussion question (1 minute). 
  • Representatives are invited to join the facilitator for a quick training while groups discuss the question provided (4 minutes). 
  • Representatives return to their groups and begin working on the task (15 minutes). 
  • Groups are invited to work through the processing questions on the back of the Team Sheet (10 to 20 minutes). 
  • The whole group gathers back together to share some overall insights. (10 minutes). 

Team Sheets, in my experience, have been a great way for me to team build with larger groups giving everyone the opportunity to plan, problem-solve, and work together on a task and process the learnings. I don't get to hear all the discussions, but each team gets to form their own take-aways. 

Let me know if you have questions. Leave a Comment below.

All the best, 

Chris Cavert, Ed.D.

P.S. Paper Transporter is another activity presented like Team Sheets (video included).
0 Comments

House Puzzle of String (a Paired Activity) with Video

8/19/2025

0 Comments


[NOTE from Chris: Before you watch the video, if you want to participate in a little 'Thought Experiment' check out my invitation below.]  

Several months ago, I started purposefully collecting and documenting problem-solving activities for pairs. I like using concentric circles* with groups giving all pairs icebreaker questions to answer. Then, moving one circle "to the left" three people forms new pairs quickly. Now, instead of just using icebreaker questions, why not throw some fun problem-solving into the mix where two people work together on a task? Mixing it up makes for good engagement and a bit more complex interaction.

*Concentric Circles – an 'outside' circle of people facing towards the center of the circle and another 'inside' circle with each person facing someone from the outside circle. 

A couple weeks ago in the FUNdoing Fridays email I shared a quick idea I had for a paired activity calling it the House Puzzle of String. Sam Sikes, in his 1995 book, Feeding the Zircon Gorilla and Other Team Building Activities, calls it The House – he uses a long activity rope. Here's a little snapshot of history:
Picture
Sam's Instructions (brevity brilliance): "Ask the group to pick up the rope." [An untied 40- to 50-foot rope for up to 12 participants lying in a pile on the ground.] "Tell them they can slide their hands along the rope, but they can't let go and/or trade places in line. Their task is to form a house or an envelope, whichever they prefer, without the rope doubling back on itself. You may need to provide a sketch of the end product for them to see." [I love the reference of the 'envelope.' I wonder if that's a recognizable image now.]
Picture
Picture
The image on the left would be the 'sketch' of the end product. So the group, everyone holding onto the rope, is challenged to form the house puzzle like the solution in the picture above. (After the group in the picture above solved the puzzle, they set it on the ground.)

House Puzzle of String
The image above on the right is the one I created for the House Puzzle of String paired challenge (the full size PDF download is below). The eight pathways in the house I call 'channels'. Using a 48-inch (122 cm) piece of string (or yarn), two people work together to lay out the string inside the channels without the string 'doubling back' on itself. The additional challenge is that the string cannot cross over any of the channel lines.

Video Note: I edited the video down to a about 8.5 minutes. It took my friend Dillon and I a little over 12 minutes to complete the task. (A majority of the time was spent getting the string within the channel lines – moving one part of the string often displaced another part of the string. Run with that metaphor!) 
housepuzzle_diagram_cavert.pdf
File Size: 8 kb
File Type: pdf
Download File

Thought Experiment: Here's an email from a FUN follower friend of ours. After reading about House Puzzle of String he inquired: 
Tell me please, why do you need a pair to do it with the string? Can you do this alone?
The Experiment: Watch the video and then speculate how I responded to our friend. After a bit more contemplative prose I'll share my response (just a little trivia and a way to hide my response for now).

The House Puzzle is a 'Transum' or 'Path Puzzle' (Dillon discovered this.) Here's an image I swiped from the results of searching 'Transum'. Solve all the shapes (tracing over all the lines and dots) without taking your pen off the paper or doubling any line. 
Picture
One Answer for the House Puzzle of String: 
Picture
What have you speculated? Why would I program this activity for two people? Here's my response: 
Yes, this one can be done solo. However, I'm anticipating the interaction between two people doing this task will be noteworthy – open up some good learning conversations. 

And another Yes. Many tasks are much 'easier' (in some ways) doing them alone – "I'll just do it myself." With this mindset we are losing the practice (and benefits) of working with others....I like to use partner activities for some low risk people practice. 
If you considered another reason for using this activity with pairs, I'd love to know! And, what other solo activities can we turn into a paired experience? Leave us a Comment below. 

People Practice Questions to Ask
  • What parts of the challenge were difficult? What parts of the challenge were easy? 
  • Raise your hand if you could have done this challenge on your own. What changes in a task like this when you are working with someone else?
  • What are some of the things you do and say when you're working well with someone else? 
  • What benefits do you get from knowing how to work with others in a productive way?  


Keep me posted!

​Chris Cavert, Ed.D. 
0 Comments

Relationship & Trust Building Cards (Print-N-Play)

2/28/2025

2 Comments

 
Picture

A recent client wanted me to begin their requested teambuilding program (for six people) with a trust activity. The client was concerned about the trust level in this particular management team. Instead of explaining my belief that every experiential group activity has the potential to focus on the concept of trust I simply agreed to include one.

Serendipitously, I ran across an activity called 'Trust' while searching SessionLab for reflection activities. [The link goes to a post called, '53 team building activities for work (and to have fun!)' – mentioned in the last FUNdoing post. Scroll down to the 'Team Bonding' section in the post to find the details for the Trust activity from the Thiagi Group.] I decided to use this one for a 'Consider & Tag' experience as a way to find out some of the top concepts and behaviors the team of six had about trust in the moment.


Building Relationships & Trust Cards – Consider & Tag (my name for the experience)

Needs & Numbers: One set of 30 R&T Cards (and some blank cards - included in the PDF) for a group of 6 to 24. You'll also need some markers (I like providing Sharpies), some masking or painters tape (easier to remove from the walls and the cards), and some small pads of PostIt notes). 

Set Up: My favorite way to set up the cards is to tape them on an open wall (safe to tape things onto – some places do not like things taped to their walls). I tape the cards with some good distance away from each other (if I have it), so when participants are doing a little 'Gallery Walk' to 'Consider' the information on each card, there is room to move around each other.

In the case of my group of six, I placed the cards around the the edges of the large conference room table in the room (another way to display the cards). I had enough room around the (gigantic) table to spread the cards out enough to make room for viewing. 

There have been Consider & Tag experiences where I scattered the cards around on the floor as well. Be creative with the space you have. Just be sure there's lots of room to move around the cards.  

Process: The basic frontloading I use for any Consider & Tag experience is to present the related concept the cards support and then provide some time for the participants to consider which cards are most important to them. This consideration period can be anywhere from 3 to 10 minutes (or more) depending on the groups objectives and the time you have.

Then, there will be a time for everyone to 'Tag' their top choices. The number of tags everyone gets varies based on the amount of time you have for the experience. For example, I tend to give groups larger that 12 three tags (each person's top three choices), and groups of 12 or less I ask everyone to tag their top five choices.

Tagging shouldn't take too long, participants will have a pretty good idea (after considering) of their top choices once they begin tagging. Before tagging, everyone will need a little pack of PostIts. (I take the standard pack of PostIts and break them up into 4 or 5 little packs and put all these little packs in a convenient place to pick up.)

Then, decide, based on the group, if you would like each person to write their first name on their PostIts or leave them blank. Is the group ready to let everyone know their choices, or will it be better to be (somewhat) anonymous? Once the tagging process is understood by the group, let them tag away.

When someone is done with their tagging, they can return to their seat (if you are set up for sitting), or they can spend more time 'considering' – walking through the cards some more to see if they want to change their mind, or take a little break until everyone is done. 
​
​
When the tagging is complete, it's time to look at the data. Let participants quietly return to some gallery walking to see what was tagged. I like to remind my groups that the data represents what their group members find most important to them in that moment – it doesn't mean cards without tags are not important. There have been a few times, based on a group's objectives, when we also spent a little time talking about diverse perspectives. 
Picture
Processing: After an appropriate amount of time to review the data (gallery walk), the group can discuss the findings. Here are my two favorite questions during this part:
  • What is the data telling you? 
  • What else is the data telling you? 

Of course, there are a variety of ways to discuss the group's experience based on their objectives. I like this process because it brings a BIG concept (in my latest experience with the cards, building trust) into some focus as to what is most important to the group at the time. In my example, my group of six started talking about the top tagged cards (above) and were ready to develop some future actions to put the concepts and behaviors into practice.​
Extending Idea I had a little time to try something with this management team of six to experience some consensus-building. I asked them to rank the six cards shown above in order of importance. I said, "If you were to use these concepts and behaviors as your immediate priorities and put team into action, which one would you start with, then, what would be your second, third, fourth and so on." 

After about 10 minutes, I stopped the group to notice the point that 'deciding' on priorities and actions takes time and commitment, as they already knew. So, I said, "As a group, how do you want to go about allocating the time you need to tackle the goals you have for yourselves in the coming months?" (This was a task I left them to think about and address during the second day of their retreat.) 

If building consensus skills was one of the group's objectives, I would have provided more time for them to work out the priority of the cards. But with the brief encounter with the exercise, the group recognized the point. (And I know I can extend this process with any Consider & Tag activity in the future.) 

Here are the Relationship & Trust Building Cards. Let me know how they work for you. Leave us a Comment. 
relationshiptrustbuildingcards_cavert_2025.pdf
File Size: 421 kb
File Type: pdf
Download File

All the best, 

Chris Cavert, Ed.D. 

2 Comments

Figuratively Speaking Conversation Cards (Print-N-Play)

1/10/2025

0 Comments

 
Picture

During my continuous effort to understand how language is used to create meaning, I have run into a significant number of lists with two-word quotes or “phrases.” It became apparent that some of these phrases did not have a true literal meaning, they are used in a figurative context – an understanding of the phrase can take on slightly different meanings depending on the perception of the person using it. I’ve collected some of these figurative phrases (below) and put them on small cards to use as conversation starters in small and large group settings. The phrases can even be used as a way for one person to contemplate what shows up for them after drawing a card from the deck and reflecting on the phrases meaning and significant in the moment.

​
Activity Objective: Participants share the meanings of the phrases they hold during conversations with others in the group.
 
Facilitated Objective: Learn more about the ways peers, within a group, think about ideas and explore the use of figurative language.
 
Needs & Numbers: Print and cut out the 36 phrase cards below on light colored paper of your choice. For long-term use I suggest you laminated the cards. This set of 36 cards works well with one-on-one conversations and up to 36 participants in small group conversations.

 
Time: 15 to 20 minutes at any time during a program – longer if you plan for more ‘conversation’ practice.
 
Set-Up: On a table or open floor space, spread the cards out, phrase side up or phrase side down (for some mystery). When setting them out phrase side up, be sure all the phrases are visible for reading.

​
Procedure: These cards are simply prompts to short, or long, conversations – What does a phrase mean to the person holding it?
  • Initially, get a card to each person in the group. Cards can be scattered out on top of a table (as described above), or you can have a few people in the group deal out the cards to everyone.
  • Explain that these cards have a ‘figurative’ meaning (you might go into a bit more explanation if needed). Have participants take a moment to quietly reflect on the meaning of their phrase and how this meaning might be significant to them in their lives.
  • When ready, ask everyone to form groups of two or three people – encourage the group to be inviting and meet new people.
  • Let them know they will be sharing their thoughts about the phrases they are holding within this small group, and they will have about three minutes together to engage in short conversations about their thinking.
  • Remind everyone to stay curious and ask questions related to what others are saying to keep the conversation going.
  • At the end of the three minutes, ask the group to ‘shuffle’ their cards. Meaning, walk around and exchange cards with others mingling throughout the area.
  • When you say, “STOP” everyone should have a new card/phrase to reflect upon and talk about after getting into new groups of two or three people.
  • Provide time for several rounds as a way to put more new faces together.

NOTE: You’ll notice some blank cards included below for figurative phrases you’d like to add to your set.
Here is your Figuratively Speaking set of cards: 
figuratively_speaking_2025_cavert.pdf
File Size: 779 kb
File Type: pdf
Download File

NOTE: Clicking on the document link gets you to a preview – it does not automatically download. You can print yourself a master copy from the preview. If you want to save a copy to your computer, click the download icon at the top right of the preview page. 

Please let us know how these conversation starters work for you. Leave us a Comment below. 

Have fun!

Chris Cavert, Ed.D. 
0 Comments

"Fantastic!" Stories & Connections (a.k.a., Human Bingo) Print-n-Play

7/19/2024

0 Comments

 
Picture

Our friend from Israel sent us a version of the Human Bingo icebreaker. Historically (for me), everyone gets a handout with a 5 by 5 grid (25 squares – the center square is a 'free' space). In each square is an experience of some kind, like, "Favorite pizza topping is pepperoni," or "Has been to Ireland," or "Rides motorcycles." To play, everyone mingles around looking for people in the crowd that have had these experiences. Once they find someone, they ask the person to sign the square.

The Objective: Collect enough signatures to get 'five in a row' vertically, horizontally, or diagonally so you can yell, "BINGO" and win the game. Or, as I've played it from time to time, get as many BINGOs as possible in the time allowed – so you can meet and connect with more people. (Search "Human Bingo" on the net for tons of examples.) 

Our friend found an alternative approach to the basic Human Bingo encounter called, 'Back to Nurture Bingo' in the book, Playful Activities for Powerful Presentations (1993), by Bruce Williamson. (And I do want to find out how our friend got a hold of a copy?!)

In Williamson's version, along with some of those 'typical' icebreaker questions (e.g., "If you could live anywhere, where..."), there are prompts to life stories, like, "Describe a perfect day," "Children are," and, "What fills you with a sense of wonder?" This changes the quick-search-find-and-sign squares into little conversations. 

Williamson's version also includes an additional feature that elevated this activities status for me (meaning, I'll be using this version). There are 'tasks' including in the experience. If you've ever played the task version of 52 Card Pick Up, it's like that (just not as many tasks). Check out the grey squares above to get the idea. 

Stories & Connections
I was part of an open-enrolment activity training recently and thought it would be a nice audience to try this out with, so I made us a handout (below) to get us started.

You'll find the instructions included on the handout (you can see them in the header above). Here are a few things I want to tell you about the handout: 
  • To change things up a bit, and to add some emotion (as well as, to avoid the traditional 'finality' of the word BINGO), when players do get five in a row, I've asked them (in the instructions) to yell, "Fantastic." (We had a few of these during the training – it evoked smiles.)
  • I added one more row to the traditional 5 by 5. By doing this, there are eight more 5 in a row possibilities. 
  • I initially introduced the activity to the participants as a 'Soft Start" (or "Unofficial Start" if you learned this from Mark Collard). However, I decided to extend play into the entire day. By doing this, participants continued to interact with each other during breaks and lunch. And, allowed for more "Fantastics" to spontaneously erupt.

One last thought about Stories & Connections. I'd like to develop additional handouts with more focused topic (concept) stories like Leadership, Trust, Helping, Relationships, or Preferences. Then, we can be even more intentional about working on group outcomes.

​Here you go!
stories_and_connections_cavert_2024.pdf
File Size: 159 kb
File Type: pdf
Download File

Let us know how it goes – share in the Comment section. Thanks!

​All the best, 

Chris Cavert, Ed.D. 
0 Comments
<<Previous

    JOIN
    FUNdoing
    Fridays
    Team Building Activities sent to your email twice a month! 
    Picture
    FREE Reflection Activity just for signing up! 

    Picture
    Processing for Beginners
    FREE Mini-Course

    Click for Information

    Some Team Building Tools at the STORE! 
    Picture
    Details & Purchase
    Picture


    Details & Purchase
    Picture
    Details & Purchase

    Blog Author

    Dr. Chris Cavert is an internationally known author, speaker, and trainer in the area of adventure-based activity programming and its relation to community and pro-social behavior development.

    Blog Purpose

    This blog is a space for hands-on programable fun - energetic activities and ideas that can be used as a means to bring people together; activities and ideas we as educators can add to our social development curriculums. 

    Categories

    All
    Action Songs
    Activities
    A Files
    A-Files
    Challenge Course
    Chiji Cards
    CUP Activities
    Ed Tech 4 Adv Ed
    Facilitation
    Fun Props
    Large Group Activity
    Lessons
    Let's Talk About
    List Play
    Noodles
    No Props
    On Pedagogy
    Print N Play
    Processing
    Programming
    Puzzles
    Read This
    Repurposed
    Resources
    Small Group Activities
    Tools For Team Builders
    Top 10 Activities
    Variations
    Videos
    Virtual
    What? & Why?
    ZOOM Books

    Archives

    April 2026
    March 2026
    February 2026
    January 2026
    December 2025
    November 2025
    October 2025
    September 2025
    August 2025
    July 2025
    June 2025
    May 2025
    April 2025
    March 2025
    February 2025
    January 2025
    December 2024
    November 2024
    October 2024
    September 2024
    August 2024
    July 2024
    June 2024
    May 2024
    April 2024
    March 2024
    February 2024
    January 2024
    December 2023
    November 2023
    October 2023
    September 2023
    August 2023
    July 2023
    June 2023
    May 2023
    April 2023
    March 2023
    February 2023
    January 2023
    May 2022
    April 2022
    March 2022
    February 2022
    January 2022
    December 2021
    November 2021
    October 2021
    September 2021
    August 2021
    July 2021
    June 2021
    May 2021
    April 2021
    March 2021
    February 2021
    January 2021
    December 2020
    November 2020
    October 2020
    September 2020
    August 2020
    July 2020
    June 2020
    May 2020
    April 2020
    March 2020
    February 2020
    January 2020
    November 2019
    October 2019
    September 2019
    August 2019
    July 2019
    June 2019
    May 2019
    April 2019
    March 2019
    February 2019
    January 2019
    December 2018
    November 2018
    October 2018
    September 2018
    August 2018
    July 2018
    June 2018
    May 2018
    April 2018
    March 2018
    February 2018
    January 2018
    December 2017
    November 2017
    September 2017
    August 2017
    July 2017
    June 2017
    May 2017
    April 2017
    March 2017
    February 2017
    January 2017
    December 2016
    November 2016
    October 2016
    September 2016
    August 2016
    July 2016
    June 2016
    May 2016
    April 2016
    March 2016
    February 2016
    December 2015
    November 2015
    October 2015
    September 2015
    August 2015
    July 2015
    May 2015
    April 2015
    March 2015
    February 2015
    January 2015
    December 2014
    November 2014
    October 2014
    September 2014
    August 2014
    July 2014
    June 2014
    May 2014
    April 2014
    March 2014
    February 2014
    January 2014
    December 2013
    November 2013
    October 2013
    September 2013
    August 2013
    July 2013
    June 2013
    May 2013
    April 2013
    March 2013
    February 2013
    January 2013
    December 2012
    November 2012
    October 2012
    September 2012
    August 2012
    July 2012
    June 2012

    RSS Feed

Proudly powered by Weebly