FUNdoing - Activities for Team Builders
  • FUNdoing
  • About
  • Blog
  • Resources
  • Books
  • Trainings
  • Ricochet
  • Contact
  • Store

Tools for Team Builders: Making a Hole Tarp (video)

4/27/2025

0 Comments

 
Picture

I learned the Hole Tarp activity from my friend Tom Heck, probably about 10 years ago. In the last three weeks I saw the Hole Tarp several times during some of my activity hunting boughts (and then realized I never got this one to the FUNdoing Blog). So it's still alive and well. HERE'S a retro video from Tom. In his video you'll see some white tape near each hole. His challenge for the group was to get them to roll the tennis ball across each piece of tape without the ball falling off the tarp. 

As you'll see in the video (below), I use lines of different lengths to cross. I have also developed a nice progression with the Hole Tarp (below) to account for the skills and abilities of each group in play. Each Hole Tarp can accommodate 6 to 8 participants. When you have more than 8 people in your group, be sure to have more Hole Tarps on hand. Each group is then free to work their way through the different challenge levels at their own pace. I like to see how many Levels each group can make it through in 15 minutes. (I hope to have a video of some groups in action soon.) 

Here is a quick summary of the challenge Levels:
  • Main Rule: The ball many not be touched while it's on the tarp.
  • Level 1: Cross as many lines as possible before the ball falls off the tarp. When all five lines are crossed, move to the next Level. 
  • Level 2: Circumnavigate each hole. This means, the ball must travel around each hole crossing the hole's line twice. When all five lines have been crossed, move to the next Level.
  • Level 3: Circumnavigate each hole ON BOTH SIDES of the tarp. After going around all five holes on side one, get the ball to side two, without touching it, and go around all side two holes. 
  • Level 4: Circumnavigate as many holes as possible. Go around the five holes on side one. Get the ball to side two and go around all five holes. Then, go back to side one and circle the five holes there. Then, back to side two, and so on. 

I'll do a full write up of other aspects of the Hole Tarp (like using two tennis balls) once I catch some groups in action. Until then, fill in the blanks as to what makes sense for the challenge Levels. 

And, you can reach out to me if you have questions.

Editorial Note: Shooting video by oneself is a bit tricky. Forgive the 'interesting' moments and absorb the intent. Thanks. 

Have fun out there!

Chris Cavert, Ed.D.  

P.S. A big thanks to Training Wheels for letting me film at the warehouse!

0 Comments

Word Building, Ltd. (CrowdWords)

4/10/2025

0 Comments

 
Picture

In 2015 I posted Word Building with Jumbo Letter Tiles. It was a more portable version of Word Building using 3.5 inch noodle chips (with letters written on them). I'm going to share with you (below), the next iteration of Word Building – using 'limited' (Ltd) resources. I recommend you take a little journey back in time and read the original post to get the big picture. This limited edition might be clearer with the additional information.

Needs & Numbers: 
  • You'll need a letter set. The prepped and ready large tile version of choice (for me) is CrowdWords (developed by Trevor Dunlap and Matthew Broda – their activity guide includes 26 ways to use the larger letter tile set). 
  • In this 'limited' version it might be faster to make your own letter set, based on the 'concept' words you have chosen, using index cards or small paper plates. See the original Word Building post for details. (Be sure the letters don't show though the paper product you are using. A light highlighter color works well.) 
  • Use a 50-foot activity rope or four cones to outline the 'letter pool' – a rope circle or cones at the corners of a square. 
  • One spot marker (hula hoop or carpet square) for each team. If inside, you could tape out a small square as a 'spot' for each team.
  • Flip chart paper (on a stand if you have one), tape and some colorful markers. 
  • This one plays well with 12 to 30 participants (you will be dividing into groups of 2 or 3 people). 
  • ​And a timing device. 

Set Up: The preparation for the game is a little more focused (additional time is needed to prepare). Choose a concept you want to work on and discuss (reflect upon) based on an objective a group is working towards. It could be teamwork, leadership, trust, collaboration, community, etc. For example, I asked an AI engine to give me 15 five-letter words related to behaviors of a cooperative community – the bonus included a little information on how the word fit – 'Blend' - harmonizing differences into unity.

Then, I picked 10 of them for the 'word list' I'm going to use with a group of 30 participants: 
  • Build
  • Reach
  • Share
  • Trust
  • Model
  • Value
  • Adapt
  • Align
  • Offer
  • Blend
In preparation for the activity, I'll write all of these words on one piece of flip chart paper. 

Once I have all the words, I'll need a letter tile for each letter in each word – I need 50 tiles to make all the words. With this particular list I would make my own tiles since there might not be enough 'Es' or 'As' in a set of CrowdWords(?). Then, here's the other time requirement. I want to include at least 15 to 20 extra letter tiles that ARE NOT in any of these words. So, I will make a couple of 'Js', a couple of 'Ks', and a few 'Ys', a couple 'Qs', 'Ws', 'Xs', and 'Zs'.

NOTE: If you are going to be working with less than 30 participants, you might not need as many words. Think of how many groups of three you will be making (and maybe there are one or two groups of two), and be sure to have a word for each team. For example, if you have a group of 16, you'll have four teams of three and two teams of two. You need six five-letter words.
Almost ready! Now that you have your letter set, place down your rope circle (or coned square) and place all the tiles, letter-side down, inside the shape of choice. This is the 'letter pool.' (See the header picture above.) Somewhere near the letter pool display the list of words your going to use with your group. Place down a spot marker for each team around the letter pool. Each spot should be about 5-feet from the pool. Now you're ready. 

Let's Play Word Building
When your group arrives, creatively divide them into small 'teams' of three (and some twos if needed). Invite each team to locate one of the spot markers and stand by it. They are ready for the rules. The rules for this limited version are just about the same as the original – just some minor additions. Your going to frontload the game this way:

"You are all on a small team. During this game, each team is required to gather enough letters to make one of the five-letter words on this chart." [Point out the chart.] "These words are related to some of the behaviors that take place within a cooperative community."

When you have purposefully planned time for this, discuss some of the words on the list – "How are these words related to a cooperative community?" You are priming the group with information about community behaviors. Some they might use during the activity, some they may not. Like this: Prime-Experience-Reflect. "What behaviors showed up for you and how were they helpful," for example. 

Then continue: "This is a timed event. Your group, all the teams, is challenged to complete the task as quickly, and safely, as possible. Time will start when the first person enters the letter pool in front of you. Time stops when every team has created a five-letter word. Here are the rules of play:"


RULES of PLAY
  • Only one player from each team can enter into the letter pool at a time (e.g., if there are 10 teams, up to 10 people can be inside the letter pool).
  • After entering the pool a player is only allowed to pick up one letter tile. 
  • If a player chooses to take this tile from the circle, no one in the 'group' may look at the letter until it is flipped over onto the teams spot marker.
  • All players on each team must take turns going into the letter pool - meaning, all players from a team must go into the pool once before someone can go in a second time and so forth. 
  • If a team decides to keep the letter taken from the pool it is placed down on their spot marker and must be touching the spot or be touching a letter that's touching the spot.
  • If a team decides NOT to keep a letter it is brought back into the letter pool and placed letter-side down inside the pool. In other words, if a letter is not wanted it goes back into the pool – letter-side down. This mean a letter tile may not be given to another team.  
  • Each team may have up to six letter tiles at their spot - when the seventh letter tile is brought to a team's spot one must be taken back to the pool on the next player's turn and placed letter-side down before picking up another tile.
  • When all teams have spelled out a five-letter word at their spot, the time stops.
Here's what I like about this variation:
  • My educated guess is (I haven't tried this version yet), many groups will not have the foresight to assign each 'team' a different word from the list at the start. They do not yet know there are just enough of the right letters to make all the words. To discover this fact, they will have to fail, identify the problem, and solve for it before the next attempt. NOTE: I predict I will get this question at some point: "Do we all need to build a different word?" I will answer (repeating the directions), "Every team will need to build a word from this list." (I do not want to solve a problem I'd like them to solve.)
  • There are resources that will not be needed to complete the task. What will they do with them? How will they discover they are not needed? What will they do with them? Will they be 'in the way' or will they put them somewhere so they they won't repeat work that is unnecessary? 
  • When will they discover that helping each other, within the rules, is essential to getting 'better.' Who will discover this and how will it be accepted by others? 
  • Will the participants focus more on the task, and getting faster, or will there just as much focus on the process and the people within the process – listening to and taking care of each other's needs. 

I'm guessing three or four games will shift the mental models needed and move groups to a faster time and acceptable interaction – process improvement. Check out the original post for some additional reflection questions I like to use with this activity. 

Let me know what you discover and if you find any other useful additions (or omissions). 

Thank you for what you do out there!! 

Chris Cavert, Ed.D. 
0 Comments

Figuratively Speaking Conversation Cards (Print-N-Play)

1/10/2025

0 Comments

 
Picture

During my continuous effort to understand how language is used to create meaning, I have run into a significant number of lists with two-word quotes or “phrases.” It became apparent that some of these phrases did not have a true literal meaning, they are used in a figurative context – an understanding of the phrase can take on slightly different meanings depending on the perception of the person using it. I’ve collected some of these figurative phrases (below) and put them on small cards to use as conversation starters in small and large group settings. The phrases can even be used as a way for one person to contemplate what shows up for them after drawing a card from the deck and reflecting on the phrases meaning and significant in the moment.

​
Activity Objective: Participants share the meanings of the phrases they hold during conversations with others in the group.
 
Facilitated Objective: Learn more about the ways peers, within a group, think about ideas and explore the use of figurative language.
 
Needs & Numbers: Print and cut out the 36 phrase cards below on light colored paper of your choice. For long-term use I suggest you laminated the cards. This set of 36 cards works well with one-on-one conversations and up to 36 participants in small group conversations.
 
Time: 15 to 20 minutes at any time during a program – longer if you plan for more ‘conversation’ practice.
 
Set-Up: On a table or open floor space, spread the cards out, phrase side up or phrase side down (for some mystery). When setting them out phrase side up, be sure all the phrases are visible for reading.

​
Procedure: These cards are simply prompts to short, or long, conversations – What does a phrase mean to the person holding it?
  • Initially, get a card to each person in the group. Cards can be scattered out on top of a table (as described above), or you can have a few people in the group deal out the cards to everyone.
  • Explain that these cards have a ‘figurative’ meaning (you might go into a bit more explanation if needed). Have participants take a moment to quietly reflect on the meaning of their phrase and how this meaning might be significant to them in their lives.
  • When ready, ask everyone to form groups of two or three people – encourage the group to be inviting and meet new people.
  • Let them know they will be sharing their thoughts about the phrases they are holding within this small group, and they will have about three minutes together to engage in short conversations about their thinking.
  • Remind everyone to stay curious and ask questions related to what others are saying to keep the conversation going.
  • At the end of the three minutes, ask the group to ‘shuffle’ their cards. Meaning, walk around and exchange cards with others mingling throughout the area.
  • When you say, “STOP” everyone should have a new card/phrase to reflect upon and talk about after getting into new groups of two or three people.
  • Provide time for several rounds as a way to put more new faces together.

NOTE: You’ll notice some blank cards included below for figurative phrases you’d like to add to your set.
Here is your Figuratively Speaking set of cards: 
figuratively_speaking_2025_cavert.pdf
File Size: 779 kb
File Type: pdf
Download File

NOTE: Clicking on the document link gets you to a preview – it does not automatically download. You can print yourself a master copy from the preview. If you want to save a copy to your computer, click the download icon at the top right of the preview page. 

Please let us know how these conversation starters work for you. Leave us a Comment below. 

Have fun!

Chris Cavert, Ed.D. 
0 Comments

3D Object Line Ups

11/29/2024

0 Comments

 
Picture

One of the things I love about being a team building facilitator is that I'm surrounded by toys. When I look around at the toys (i.e., tools), I'm prone to get ideas for new ways of using them. 

The other day I looked over at a shelf with a clear container of tossable items perched upon it. For whatever reason (the creative spirits get credit for sure), the idea of a 3D Object Line Up popped into my head. 

Historically, I've done lots of 'Line Up' activities. A couple involve Chiji Cards (or any other image cards). They are written up as Chiji Line Up and Biggest to Smallest in The Chiji Guidebook, Cavert & Simpson (2010). The Basics: In the Chiji Line Up activity, everyone from a group of 10 to 40 people pick a Chiji (image) Card and then they work together to line up alphabetically by the name of the image on the card - a name given to the image by the holder of the card. In Biggest to Smallest the group line up involves ordering by the 'real-world size' of the image on the cards - to be determined by the card holder or the group, depending on how the group wants to work together. There are other subtle details to the purpose of the activities, but you get the idea. 

When I saw the tossables on my shelf the two-dimensional image card line up activities made me think of trying them in 3D. The other thought that came to mind was programming one of the 3D line ups with other activities that involve the tossables. 

For example. The last FUNdoing Blog post, 'Toss-A-Name Game with PTP' could be done before a 3D Line Up. Work the active Toss-A-Name activity until you've added as many items as the group can manage. Process through the activity and then move to one of the 3D Line Ups, a more cognitive process, and then talk about how the group managed to organize themselves – what skills did they need to accomplish the task.

​Let's run you through the 3D Line Ups...
3D Object Line Up: Alphabetical Order

Activity Objective: As quickly and efficiently as possible, line up in alphabetical order based on the names of the objects. 

​Needs & Numbers: You'll want a bunch of different, safe, tossable items – at least one for every person in your group (most of the items in the picture above I will use – I will not use the Ricochet balls, they are a solid item we don't want to get hit in the face with). You will also need a timing device. 

From my experience with using image cards, this activity will work well with 10 to 24 participants, for about 15 to 20 minutes. 

NOTE: As I explained above, I will most likely use one of the 3D Line Ups after I've done an activity using the safe tossables – most of the gear is already in the groups possession so the 'gear-transition' is faster. 

Process: Before you can provide the information for this Line Up, everyone will need a safe tossable item. Determine a fun, fast way to get items to everyone. (My soul needs to ask you not to hand out one item at a time as you walk around a circled group of players. Make it fun and fast.) 

You can all be simply standing around in a small clump – participants DO NOT need to be standing in a circle formation to absorb the directions. When everyone is ready to listen, simply provide the Objective, then field questions about the task. Answer the ones that will not solve any of the 'problems' for the group. 

OBJECTIVE: "Line up, in a circle formation alphabetically by the names of the items you are all holding – a circle can be defined as a curved line. 

After sharing the Objective, you'll (most likely) get some questions about your expectations. For example, "What is the name of this object?" My response to this one is, "That's up to you." Remember, the idea here is to avoid solving 'problems' for the group. Let the group members identify and solve the problems they encounter. 

NOTE: I use this type of activity (2D or 3D) to get my participants to make choices (either independently or as a group), get people talking to each other, and solve a given task (as team building tasks go, this one, in my opinion, is a low complexity experience). 

When they are ready, let them move around to work out the Line Up. 

After the group has completed the task (standing in a circle formation alphabetically by the name of the objects), congratulate their efforts, then tell them this: 

"Now that we've practiced lining up, let's add a little challenge. When you're ready, mingle around and exchange objects with others in the group. Keep doing this until I tell you to stop – then, stop exchanging objects and stop moving. After stopping you will not be allowed to move until I say, GO!" 

NOTE: The language is important – especially, "When you're ready..." I'll get back to this. 

Now, start the group exchanging objects. (During this time, participants are making quiet connections with each other – subtle, and important.) Stop the group after about 30 seconds – everyone should be holding one object – and then provide this information: 

Remember, you are not allowed to move until I say, GO! When you're ready, you're going to line up again. This time, I'll be timing how long it takes you to get into alphabetical order by the name of the object you're holding. I'll start the time when you tell me you're ready and stop the time when you're your in alphabetical order. Are you ready? [There answer will determine your response. For example, if they say "Yes" then you say "GO!" starting the time.]

Let's get back to "When you're ready..." By saying this, I'm inviting the group (without telling them) to take some time and talk to each other – to identify one or more problems, make a plan to solve a problem, then "We're ready" to start the clock and work their plan. 

The main problems to solve, as a group, is naming the objects and then, taking time ("We're not ready yet!") to agree to and learn the names of the objects. If the names of objects change after the exchanges, getting into alpha-order can take more time. If the group is working with knowns, the time can be faster. This is just one example of what a group can do to lower their time – there are other ways, as well, to shave off time. 

HOW MANY ROUNDS TO PLAY? 

The answer to this question will depend on the kind of work you're doing with a group. The introduction Round and two more might be enough to see some improvement where the group can benefit from solving one, or more, of the problems they face. The processing will focus on what it takes to solve a problem together. 

When I can take the time to go deeper, I've used up to six Rounds to reach some 'Breakthroughs.' When I'm going for Breakthrough I give the group a time goal – "Under 30 seconds." Between each Round, problems are identified, planned for and followed, to lower the time. Based on the 'rules' above, I've seen a group solve the task in a little over 18 seconds. (Hint: All the planning can be done before the group says they're ready. And remember, once you say "Stop" to halt the exchange of objects, the group may not move until you say "Go!" – so all the planning is done in the place where each person has stopped.) 

The major key for any group is for them to discover what is preventing them from getting a faster time – they need to uncover the 'phantom rules' they are operating with in order to change the process. 

Here's the other Line Up: 

3D Object Line Up: Biggest to Smallest

For this Line Up, only the Objective changes. "Line up in a circle arranging yourselves by the real-world size of the objects you are all holding, from Biggest to Smallest."

Depending on the objects you are using, their sizes may not be a 'literal' representation of the item. For example, notice the Nose and the Eye Ball in the picture above. The sizes of these objects are bigger than their real-world counterpart. Other objects will take some conversations to determine where they fit. Like the Cat above. It could be actual size, larger, or even smaller. This is where the group can benefit from deciding together. 

Please let us know how this one works out and if you have any adaptations. 

All the best, 

Chris Cavert, Ed.D. 

0 Comments

Rope Script 2.0 (Part 1)

5/24/2024

0 Comments

 
Picture
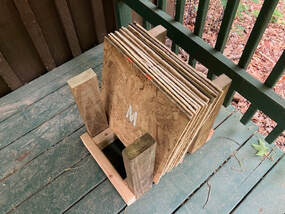
This 'Wonder' is made with five buddy ropes.

I've been revisiting my collection of activity books lately for some lost nuggets of fun and came across Rope Script in Bottomless Baggie (Rohnke, 1991, p. 45). It was a short (description) share from Karl, crediting the activity to Mark Murray.

Basically, Mark had some time before lunch one day, so he asked his seven participants (a small therapeutic group) to keep their blindfolds on (used in the previous activity) and attempt to spell out (in cursive) a seven letter words with an activity rope they had on hand. [No length of the activity rope mentioned. My typical activity ropes are 50 feet long – I'm sure this length would be fine, or a little shorter?] I can see the fun in this. There will be some planning and choosing, then lots of crawling around and finally the reveal. 

Rope Script 2.0
Here is one way I want to present Rope Script in the future. (I'll share another way to Process/Debrief with Rope Script in Part 2 next time.) 

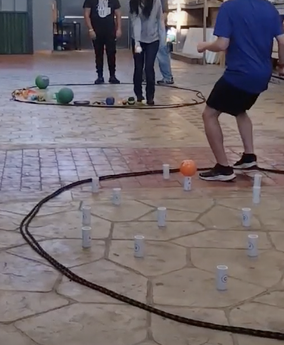
I don't use unsighted activities much anymore. Typically, I like to practice communication behaviors in sighted ways (more realistic of everyday behaviors). And I do a lot with 5 foot 'buddy ropes' so I can use a prop I have and vary the length of the overall rope by tying buddy ropes together. (The length variation comes into play with the different words we'll want our groups to spell and the size of the groups we form).

For years I used Parachute Cord buddy ropes, five feet long. However, I changed to 1/4-inch buddy ropes (five feet long), from Atwood Rope. The thicker rope is better for knot tying (learning) and it has a nice feel to it for activities like the Handcuffs Puzzle and Objectable Human Knot.

​Needs and Numbers: Each group of four or five participants will need one buddy rope for each person plus one. For example, a group of four will need five buddy ropes, a group of five will need six. We'll also need one timing device.

I believe this activity can be done with 5 to 30 participants – divided into the smaller groups. (With 20 to 30, processing discussions can take place within each small group, then popcorn out with the whole group some of the significant things mentioned in the small groups.)  

Part 1: After groups are formed teach everyone how to tie a square knot (below). Each person will have a buddy rope and use it to tie the ends of their rope into a square knot. Here's how I remember it: Right over left, twist. Left over right, twist. (Head to YouTube, I'm sure you'll find a video that shows you how if you haven't experienced this knot yet.)
Picture
During Part 1 there is some social risk and mental model disclosure ("I don't want others to see that I can't do this." "I'm bad at knots." "I'm good at knots."), and opportunities for participants to help each other learn. Some people will catch on quickly, others will take a little longer to tie and 'see' the knot correctly. This is community-building at work:
  • How are we helping each other?
  • How are we talking to each other? (What is our tone?)
  • Who is willing to accept help?
  • Who wants to get it on their own?
  • Who is willing (and able) to teach others the knot?
  • Does everyone need to know how to tie the knot or does our group only need one or two people to know how?
There is a lot to explore here. Be sure to process some of the dynamics that happen in this Part before moving on. 
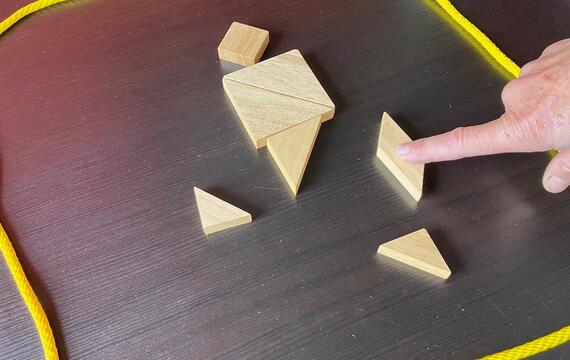
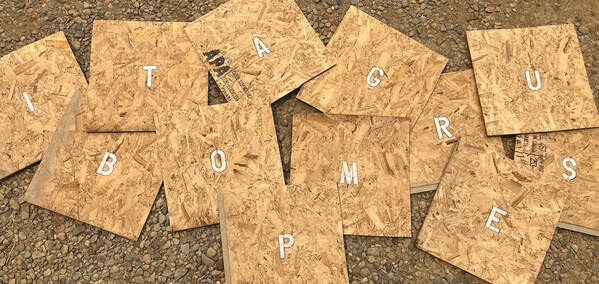
Part 2: Now it's time to start spelling. We'll begin with three-letter words and work our way up to five- or six-letter words. 

Three-Letter Words: Ask each group to tie three of their buddy ropes together using the square knot they learned – ending in a line of rope about 15-feet long (not a circle of rope). Set the extra buddy ropes off to the side. We'll need them for the longer words.

Then, say something like this: "We're ready for the spelling challenge. Using only the three ropes you just tied together, you have 60 seconds to spell out on the ground, in cursive, a three letter word. Ready? Go!" 

The abruptness is part of the challenge – the biggest one might be, "WHAT WORD ARE WE SPELLING?" Answer: "You decide." 

When time is up, go around and check out the work. See if you can read each group's word and give them a little feedback along the way.  

​Then jump right back to it: "Okay. A different three letter word. 60 seconds. GO!" 

When time is up, have a discussion about the dynamics of the two spellings and what they can learn from them. Also ask, "What do you want to do a little better during the four-letter word attempts coming up?" I also might ask: "What letters did you find tricky to manage with the rope?" This can be seen as a little advice to other groups, without calling it advice. Will anyone pick up on the help? 

Four-Letter Words: Ask each group to have someone tie another 5-foot rope to the end of the three-buddyrope-length rope they just used. Now, everyone has a four-length rope to work with.

When everyone is ready, same as above: "Spell a four-letter word, RATED G, in 60 seconds. GO!" 

Follow the same process as in the three-letter word round. Two attempts, one right after the other. After two words, encourage a discussion about each groups dynamics. What's working? What's not working – what can be better for each group? Be sure the sharing takes place with the whole group so everyone is hearing what others are discovering. Again, I will ask: "Did anyone find any other tricky letters you had to work out?" (Advice giving.)

Five- or Six-Letter Words: (Final Round) Ask each group to tie in the remaining ropes in their possession (e.g., groups of four will have a five-length rope).

When everyone is ready, there is a little change: "Okay. This time, you have 90 seconds to spell a five- or six-letter word. Ready? GO!" 


Again. Same process. Two 90-second attempts. The idea here is that each group is figuring out how to work productively together (or not).
  • What roles and responsibilities do the group members take on – accepting with clarity or by default and how did everything work out over time?
  • Was there some success? How did it happen?
  • Was there failure? How did this happen.
  • Who was all in and why?
  • Who was not in and why?
  • What's important to remember from this experience as we move on to the next adventure? 
When you try this one, let us know how it works out. My guess – this will be about a 25 to 30-minute activity focusing more on the discussions (processing) than the actual action (cognitive-heavy activity).

​Leave us a Comment with what works and any improvements. Thanks!!

All the best, 

Chris Cavert, Ed.D.
0 Comments

Double-Sided Word/Picture Circle Puzzle (Print-N-Play Share)

3/1/2024

0 Comments

 
Picture
Here's a quick share from my friends Jon and Brandon. Thanks Guys!

They created this combo-circle puzzle to use during their table top teambuilding programs. There is a 13-word circle puzzle on one side of the cards (along with a direction card), and a 14-picture circle puzzle on the other side. Jon told me they designed the puzzle this way to manage the 'solving time' issue. (If you don't know about Circles Puzzles, there are links below to get you started.)

When working with a lot of table groups, I, for one, have told groups to call me over to check their puzzle solution and then I would give them another puzzle. Often times groups are waiting for me to check their puzzle so they can play again. To solve this wait, Jon and Brandon hand out this one puzzle, and when a group agrees to the solution of the word circle puzzle they simply turn over the cards and work on the picture word circle puzzle. 

I was so excited about this new mental model I didn't ask Jon any questions (maybe he'll tell us more in the Comments). So, I'm guessing there will be some questions about the picture word circles, but walking around answering questions will go a lot faster than checking a puzzle answer. And, when I use this version, I will play until one table solves the picture puzzle, give everyone else 60 seconds to try and finish before I stop playing (or, I would stop playing when the allotted time was up – say, 20 minutes?

Here are some questions for you (and Jon and Brandon). Would you check the word circle puzzle before table groups move on to the picture circle puzzle? Is it necessary in relation to the purpose of the activity? What is the purpose of the activity? What can groups learn from it? What about giving hints? Would you give groups hints and will they keep the hints to themselves?

Don't know about Word Circle Puzzles and Picture Word Circle Puzzles? Check THIS post and THIS post. And, use the 'Search' feature on this page – type in Word Circle Puzzles to find lots of FREEbies.

Here's the PDF. Print the file 'double-sided' then cut and laminate for long-lasting fun. 
word_picture_circles_jonbrandon.pdf
File Size: 3049 kb
File Type: pdf
Download File

Answers? We're going to give you a couple weeks to work on puzzles. I'll bet you can figure them out!

Have fun out there! 

Chris Cavert, Ed.D. 

0 Comments

And So It Goes (Tabletop Tangram Teambuilding)

2/2/2024

2 Comments

 
Picture

Tangrams are my favorite brain-break (my wooden set is right behind me). Recently I was spicing up a tangrams activity and came up with this tabletop teambuilding experience for three to seven people around a table (of course you can have lots of tables in play at the same time). Let me know what you think about it – additions, variations, or other stories we could tell? 
And So It Goes

Needs & Numbers: You'll need one traditional seven-piece tangram puzzle (seen above) for every three to seven players. You'll also need something to create the Frame for each group like a short rope (e.g., 5 feet) or some masking tape. Finally, you'll need one Story Sheet for each group (at right). You'll find this PDF download below. 

Time: 15 to 20 minutes. 
Picture
Set-Up:
  • This activity is designed to be played on a floor, table, or desktop.
  • Create a frame for the characters in the story using a short rope (shown above) or masking tape. The frame can be a square or a circle that has a diameter of about 18 inches.
  • Scatter the seven puzzle pieces around on the inside of the frame.
  • Your group(s) will be sitting around the frame close enough to reach in and move the pieces.
Directions: 
  • Have the group(s) help set the Frame. Provide them with the materials (rope or tape) and the seven pieces of a Tangram puzzle.
  • Tell them the parameters of the frame (see Set-Up) and what to do with the pieces of the puzzle when the frame is complete – scatter them around inside the frame.
  • Hand them a copy of the story ‘And So It Goes’ (PDF Download below). Once it’s time to begin, each group, working independently, will read the story. When they come across a BOLD word, they are required to use all seven pieces of the puzzle, staying inside the frame, to build the character on the page the word is referring to.
  • Building: To build each character as it shows up in the story, participants take turns reaching into the frame to move one piece on their turn. Only one hand is allowed inside the frame at a time. When a participant is satisfied with how they have situated their piece, they remove their hand from the frame and may not reach in again until it’s their turn – everyone taking a first turn before anyone takes a second turn. Everyone takes a second turn before taking a third turn, and so on.
  • Once a character is complete, the story continues until the next character needs to be built. Participants take turns reading the story lines. 
  • Participants are free to talk to each other as they see fit until they arrive at the horse and rider (Together) and the sleeping (laid to rest) characters – these two characters are built without talking. These characters are marked ‘Build Silently’ on the story sheet as a reminder.  
  • If you need to, set a time limit (e.g., 15 minutes) to get as far into the story as they can. Or let the group(s) take as long as needed to get through the whole story. If more than one group is in play, you can limit the time by stopping everyone after one group finishes the story. (If you would like every group to finish their story, have a bunch of extra tangram puzzle cards to distribute that a group can work on while others are finishing – tell them about the 'Free for All' method described below to solve the puzzles.)  
  • When you've answered all the group's questions that you can, let them get started. 
Here's the Story:
andsoitgoes_tangrams_strorysheet_cavert.pdf
File Size: 322 kb
File Type: pdf
Download File

Possible Reflection Questions:
  • When you found out what we were going to be doing, solving puzzles, what was your first reaction? Where do you think you acquired this response?
  • When it was your turn to move a piece, what do you remember thinking about? 
  • How were you influenced by others when it was your turn to move a piece?
  • What part of the story resonated with you the most, and why?
  • Think about this for a moment before responding…what did it take from your group to solve the character puzzles? What did you do and say to be successful?
  • Think about the idea of diversity. How did your diversity play a part in this activity?
  • Was there any point during the story and building that diversity might have been a problem? What did you do about it? Is there something you want to do about it right now?
  • Ultimately, you’ll be solving a lot of puzzles in your life. What do you want to remember from this experience that might help you solve these everyday puzzles?
  • Let's take a moment to read the story again [read the story]. What does this story mean to you in relation to everyday life? 
Variations:
  • Free for All Build: Use this with the story build (this version usually does not take as long) or use this after the story build when groups are working on additional tangram puzzle cards. When a group gets to the part in the story where there is a character to build, each person in the group can have one hand inside the frame at any time. So, together, they can be moving pieces around simultaneously until the character comes to life. This dynamic can lead to a wide-ranging discussion about the behaviors that took place. Some groups can be calm and end up taking turns. Other groups simply love the energy and chaos of all the hands building together.
Tangram puzzles can be pretty tricky. I love using them with groups to bring up the concept of perseverance. On that note, I'll give you a few answers. Your challenge is to figure out the other three. Get good at solving the tangrams you're presenting. Eventually, you get the knack of 'seeing' how the pieces work together. 
Picture
Picture
Picture
Here's a traditional tangram puzzle template. Print it on card stock for a bit more durability – cut along all the black lines. 
tangramstemplate_traditional.pdf
File Size: 262 kb
File Type: pdf
Download File

Have FUN out there. Keep me posted!

​Chris Cavert, Ed.D. 
2 Comments

Story Cards

12/22/2023

0 Comments

 
Picture

An upcoming training for teachers includes preparing them with activities they can use to get to know their students on a "deeper" level. I thought about my go-to, Name Card Exchange, but I didn't think it was deep enough. So, here's the idea I came up with to take name cards a little deeper. (And I can still do some team building using the names.) 

The above image is my Story Card example I'll be using (for the first time) at the training. To save a little time during the training, I plan to prepare the index cards ahead of time adding the letters N, C, P, and E to the corners of each card. I'm going to make an equal amount of five different colored cards – most colored 4- by 6-inch index card packs have four colors. I'll add in the plain white index cards for a fifth color. I'm doing this so I can quickly form five working groups of like colors during the training. 

As I like to do, most often with playing cards or index cards, I hand out one to each person as they arrive at my trainings (or programs). This gives me a chance to make a connection with everyone at least once. Yes, it takes some time to do this, especially with large groups, but I'm doing this before the 'official' start time, so I'm usually done by then (besides the few stragglers I catch up with once things get going).  

Before the training, I will also prepare a large flip chart poster of the image above providing an example of a Name Card (which we're turning into a Story Card), and place this up near the two tables where I'll have lots of 'poster' markers ready for use. 

TIME TO PLAY
When it's time to begin the training, I'll invite everyone to bring their card up to the marker tables and add their first name similar to the example on the flip chart poster – "First name, nice and big." I'll also invite them to spice their card up a bit, if they want, with some marker decoration – without covering any of the letters at the corners. After they've completed the task they are instructed to join me in the open area we're using for the training activities.

When everyone is ready we'll first learn about the letters at the corners of their cards. Yes, this will involve memorization – maybe we'll share some strategies about how we memorize things? (I'm guessing some memorization feelings will bubble up for teachers, just like for students. Something to talk about if needed.) All the letters stand for a 'Significant' something...
  • N - Significant Numbers
  • C - Significant Characteristics
  • P - Significant People
  • E - Significant Events

I know I'll be doing some call-and-response to anchor in the letters, maybe even sing the C-and-R – wouldn't that be fun!! (I'm sure some of the teachers will think so.) 

As you have already guessed, this will be a pair-and-share get-to-know-you activity. Here's the gist of what I'll say: 

Now that you know what the letters on your card stand for, let's go out and tell some stories. In a moment, but not yet, I'll ask you to partner up with someone in the group. When you're ready to share your story, raise up a hand, look for someone else doing the same thing, and get together with this person. Keep in mind, that a partner might not be available to you right away. Be patient. Keep an eye on the group. Someone will eventually be available.  

With this first partner, I'd like everyone to tell the story OF your name or a story ABOUT your name. We all have this kind of story. Where is your name from or what silly or interesting fact have you experienced related to your name. Each person in your pair shares a name story and then you bid farewell to each other and think about the next story you'd like to share. 

The next stories will be from the Significant Corners of your card. Let's review – N is for...Significant Numbers. What stories do you have about things numberd in your life? For example, you are one of three siblings and you all like to play basketball together whenever you can. Or on your 14th birthday, you spent it at Six Flags where you rode your favorite roller coaster eight times. The idea is to share your significant corners telling stories about them. 


Okay, how about the C – it stands for...significant characteristic. Tell a story about a characteristic you have that has served you well. For example, you once took on the leadership role of a class project with a group that struggled with the assignment. You had some previous knowledge of the topic so you helped plan the tasks that needed to be done and helped everyone work through their part. Together you ended up with an 'A' because everyone was willing to follow your lead. 

What does the P stand for... a significant person. Tell a story about someone in your life who inspires you or has helped you in some way. Remember, wrap your answer in a story, make it meaningful to share and interesting to listen to. 


Finally, what does the E stands for... a significant event. Share a story about an event in your life that stands out for you. Something or someplace that changed your life or really helped you form into the person you are today.     

​With each partner you get together with, tell a story about one of the significant letters. It's perfectly okay to stay with a significant corner, but try to share a different story about the letter. Try to partner up with at least four, or even more, others in the group after your first story of or about your name.


What questions do you have about what we're going to be doing? [Pause to answer.] Okay. Partner up when you're ready to tell the story of or about your name.
Connecting and Going Deeper
At the initial level of getting to know their students, I'll recommend the teachers participate in this one. They can meet with five or more students in the 10 minutes I'll suggest staying with this activity. To get to a 'deeper' connection, we can have the students take some class time to write – writing is a good skill.

Students can take a seat and grab a pen. On the back of their Story Card, they can each write their teacher four two-sentence stories about each of the letters. The teacher can then collect and read the stories to learn more about each of their students. The students learned a little more about each other, and the teacher can learn even more. 

Extension
The significant stories can go beyond a one-time use. This pair-and-share activity can be done several times over a school year. We all have a lot of stories to tell using the significant letters on the Story Cards. Spend a little pair-and-share time every once in a while making sure to pair up with different people every time. Or when pairing up with someone who's heard one of your stories, tell a different significant story. 

I am seeing some good community-building in this process of storytelling. Let me know if you see anything we can add to make it even more meaningful. Leave us a Comment. 

All the best, 

Chris Cavert, Ed.D. 
0 Comments

Solve For (with Cups)

11/11/2023

0 Comments

 
Picture

I was planning for a teacher training program recently where I was tasked to include some community-building activities that could tie in with academic subjects. On my list were a few Cup activities – one being Line Um Up (from Cup It Up). It was an easy step to adapt this one into a mathematical challenge. After trying it out for the first time with this group of teachers, here’s what we have so far:

Solve For

Needs & Numbers:
  • 26 numbered cups (see above) – numbered 1 to 26, for every group of three to five participants.
  • One game spot (or something similar).
  • One ‘Cup Station’ for each group: a taped rectangle on the floor, a hula-hoop, a small rope circle, or a table.
  • One large sheet of paper (e.g., flip chart paper) and a marker.
  • One or two index cards and a pen for each Cup Station.  
  • One timing device. 

Note: I’m suggesting Cups because I already have multiple sets of numbered cups ready for other Cup It Up activities. If you’re not a cupper yet with the resources ready, you can make number sets with index cards or small paper plates. I use the numbers 1 to 26 because Cup activities also use lettered sets, A to Z (26 cups here). So it's a good correlation. 

​On another note, the 'other colored' Solo Cups are usually around the stores during the Fall and Winter Holidays. (I'm also guessing you can get the colors online all-year-round?)


Set-Up: Check out the diagram below (the diagram below shows cups in play - before play, all cups will be at the Cup Stations). Prior to the activity, you’ll want to set up the Cup Stations you’ll need (one for every three to five players) – arrange the stations like the numbers on a traditional clock face. Then put your game spot (or something similar) in the center of the ‘clock.’ I like the spacing to be about 15 feet – from the game spot to the Cup Stations. Then, set one stack of 26 cups at each Cup Station. If the Cup Station surface is flat enough, stand up the cup stack open end up. If the stack won’t stand, simply lay it on its side in the cup station.

Picture

Process: 
  • Create groups of three to five participants. Have each group pick and stand by one of the Cup Stations. Tell them not to touch the cups until instructed to do so. 
  • Let everyone know they will be doing some math during the activity. (You might decide to discuss the physiological and psychological reactions to math at this time if it's noticeable.)
  • Show all the groups the first set of four numbers listed on the large piece of paper (see header picture for an example). 
  • The objective, for each Cup Station team, is to solve for each number on the list using the numbered cups at their station. A formula – using more than one cup – must be created to solve for each number. 
  • Any mathematical symbols can be used along with the numbers to reach the sum needed – the numbers on the list. (The symbols are invisible, or assumed.)
  • Formulas must be made in the order of the numbers on the list. So, (using the second list of numbers in the header picture, for example), solve for 15 first. The first cup of the formula for 15 must be placed on the game spot, and then the next cup or cups follow in line from the game spot towards the team's Cup Station (see the diagram above). 
  • Write down your formula for each number on an index card so the formulas can be verified at the end of each round.   
  • After the first formula of cups is placed down, the group can work on solving for the next number. When this next formula is ready it can be placed down in the line – leaving a noticeable space between formulas. 
  • When all teams are ready – after answering questions – you can call "GO!" and start the timer. Team members can then touch their cups. 
  • Only the cups of a formula can be out in the playing area (in line). All other cups must stay on/in the Cup Station during the solving phase of the formulas. 
  • Once all teams have placed down a formula for each number on the list, the time stops. This is an important distinction – the time does not stop until all teams have 'Solved For' all numbers in the Round.
  • Someone (or more than one) from each team will then verbally share the formulas for each number on the list – use the index card if needed. If a formula is incorrect ask the group what they will need to do to fix it – then have them fix it. (There is no penalty/consequence.)
  • Once all the formulas have been verified (and fixed if needed), share the overall time with the group. (The first time recorded with three teams in play was 2 min., 37 seconds, using the first list of numbers in the header picture above.)
  • ​This 'overall time' (as I'm suggesting for now), is the baseline for the remaining Rounds. (Same expectation for more work. Fair?)
  • Round one is four numbers. Round two is five numbers. Round three is six numbers, and round four is seven numbers. Each Round starts the same way as Round one. NOTE: So far there is not an 'ideal' set of four lists of numbers – will a particular list of seven numbers be impossible to solve for? (See the Variation below to provide more resources to work with.)   

Why I Like This Activity?
  • When we use an 'all group' time, there is a better chance for collaboration to take place in order to meet the time expectation. 
  • Using math 'problems' to solve can bring up some good discussions about skills, abilities, and mindsets, as well as roles and responsibilities. If someone is 'not good' at math, what role do they play during each Round? 
  • Using the overall baseline time as the benchmark for each Round will, most likely, force collaboration in order to meet the expectation. And what compromises will be made (e.g., skill acquisitions) for the sake of the expectation? I'm thinking, because we have to meet a 'standard' the participants who excel at math will do the work – others will not get the practice or the encouragement to practice.
  • I'm curious to find out if some groups will not care about the expectations and focus on the 'process' of including everyone along the way – everyone feels they contributed to the results.  

Variations: 
  • Use index cards for the number list they will solve for during each Round (instead of writing the numbers on one sheet of paper). Give each group the same list of numbers, but don't inform them they are the same – if the groups share this information, it's okay. And maybe will lead to some collaboration? 
  • What if you put all the 'math-smart' participants in one (or two) teams? How long will it take, without collaborating, to solve for all the numbers? (Q: What are some of the advantages of diversity?)  
  • Allow teams to use the last number in one formula to be the first number in the next formula. This 'resource' is useful for longer lists of numbers (e.g., 6 to 8 numbers). 
If you give this one a try. Let us know what else can be done. Leave a Comment. 

All the best, 

Chris Cavert, Ed.D. 
0 Comments

Top It Off 2 - Building Lesson Part 2

10/28/2023

0 Comments

 
Picture

In the Top It Off (from Karen W.) Building Lesson Part 1, I shared a new activity from Karen just the way she sent it to us. The challenge I ended with was to take the activity and adjust it (build it out) in a way to reach a particular goal or outcome that came to your mind. Then I promised to share my build in this week's post. 

If you haven't yet, you might like to read (and build if you have the time) the initial post (Part 1) before diving into my tweaks. Again, Karen's activity is good to go just the way it is. My intention is to reveal a little bit about my approach/thinking when it comes to adapting activities to meet specific learning opportunities. 

Top It Off 2
(Increasing opportunities for problem-solving and group development.)


Time: (Chris) 30 to 40 minutes. With additional ‘problems’ to solve, Top It Off 2 might need more time to get in three or four (or five) rounds to see significant improvement.

Group Size: (Chris) 10 to 16 participants. 

Supplies: (Chris) 26 Numbered (or Lettered) PVC Tubes (clean toilet paper rolls work well), and 26 Numbered (or Lettered) safe tossable items (see the picture in Part 1). You will also need two activity ropes – one approximately 25 feet long, the other 50 feet long. 

Basically, the same supplies. However, Circle B will be larger than the original Top It Off, so you’ll need a longer rope (~50 feet) for a 15-foot diameter.


Layout (Original): One rope circle with randomly placed items marked with numbers 1 to 26 (Circle A), and one rope circle with randomly placed tubes (Circle B) marked with numbers 1 to 26. Rope circles are about six feet in diameter. Rope circles are about 10ft. apart.

Layout (Chris): Here’s where we can make adjustments to meet different challenge levels. First, I would adjust the original distance between Circles A & B to match the (assumed) throwing and catching skills and abilities of my group.

For older elementary ages I’d keep the original spacing of 10 feet apart. Middle school ages I’d go 12 to 15 feet apart. And high school ages and older 15 to 20 feet apart. One other layout adjustment I’ll make is to increase the diameter of Circle B to 15 feet and set down the marked tubes as shown in the diagram above with a noticeable open area in the center of the circle (we’ll get to why in just a moment). Circle A is set up as in the original version.


Basic Description (Original): The challenge is to get all the numbered items from Circle A to Circle B balanced on top of the matching tube. The goal is to do it as quickly as possible with the least number of penalties.

Basic Description (Chris): The adjustment I’ll make here is to separate the description into the ‘Challenge’ and the ‘Goal.’ Just a slight tweak so I can emphasize the different outcomes.

After a timed attempt I can ask, “Did you complete the challenge?” A “Yes” confirms success (and celebration). Then I can follow up with, “Did you meet your goals?” (Referring back to the product-oriented goals they set before the attempt – a time goal and a penalties goal. And if you bring in the concept of ‘process-oriented’ goals, did they achieve these?)

The Challenge: Get all the numbered items from Circle A to Circle B and balance them on their matching numbered tubes. 


The Goals: Balance all items on their tubes as quickly as possible and with the fewest number of penalties.

Before each attempt, I will have the group choose a time goal – how fast can they get all the items atop the tubes – and a penalty goal – the number of penalties they need to complete the challenge. 

Multiple rounds (e.g., two or three) are played each with a 2-minute planning period (Original).

The latter first. When it’s important for my groups to practice planning behaviors, I might require a mandatory minimum time to plan so I know we’ll have something to talk about.
​
The former. I’m a fan of improvement-oriented activities. And I like to allow time for three or four (even more) attempts (see my ‘long-form’ activity argument). There are certainly programming benefits to moving on after two attempts when the second was better than the first. The group has success, has shown they can be successful together. These feelings can carry over into the next activity and (possibly) motivate performance. But what if?


Additional attempts with the same task inevitably provide more for me to work with. Here are several possibilities:
  • More ‘problems’ can be identified and solved (problem identification is, I believe, an essential human development skill).
  • More time to practice the skills (physical and cognitive) that the group finds helpful in the task’s context. As we know about ‘transferring’ skills to the future, why not stay in the present to get better at them instead of changing the context, which requires time to process new information about a different task?
  • More opportunity for participants to challenge each other during the planning and implementation of the task (in other words, get them to ‘storm’ a little to get to the norming behaviors they want). It takes time for some people to build the courage to speak up. When we’re constantly switching activities, new information gets in the way of that ‘ordinary courage’ (Brene’ Brown speaks of) to share our thoughts and feelings.
  • More failure and time to learn about the benefits of that failure. Getting better at something, as we know, takes practice and a lot of setbacks. To really see what the group can do (or not do because of certain behaviors), we’ve got to stick with one thing to mine out the gold. Two attempts scratch the surface, and five attempts get down to the roots! I believe that’s where the real work is.
Here are the original Rules (Bold) and the Tweaks I'll make: 

Items must be thrown from one circle to the next. The item cannot touch the ground.
(Chris) Numbered items must be thrown from Circle A to Circle B (to clarify the throwing direction and only 'numbered' items are thrown – "What is an item?"). The numbered items cannot touch the ground.


Items must be placed on the tube with the same number in numerical order.
(Chris) Numbered items must be placed on the tube with the same number in numerical order – 1 to 26. (Again, specific to what an 'item' is, and the expectation is starting with number one.)

You can only touch the items while in the circle.
​(Chris) You can only touch the numbered items while inside a rope circle. (A slight clarification of expectations – a bit clearer about being inside either circle. Consider this: What if someone encircled someone else with their arms? The original Rule would allow for this – and that’s okay! Clever actually.)


Only one person in each circle at a time.
(Chris) I will not use/share this Rule. Taking out this limit will create additional problems to solve and provide more opportunities for action. SAFETY NOTE: Without the original Rule the risk level does increase. This is why you want to provide ‘safe’ tossable items. If we see an unsafe level of chaos, we will stop the activity and process what is going on. Then make plans to move forward in a safer manner.  (A quote from Karl Rohnke, “If we take out all the risk, it’s no longer an adventure.”)
 
I increased the size of Circle B to entice more group members to be inside this circle at a time. The more people in either circle, the more problems to solve – some problems will be solved beforehand, and others will need to be solved later (maybe they decide to only have one person in a circle at time). Having the tubes closer to the rope (in Circle B) will also create more problems to solve.   
​

Everyone must throw at least once.
(No Change) This Rule does force some participation – so, we can talk about, "life is about participating."


​Everyone must catch at least once.
(No Change) Forced participation again – always good to talk about. 


You cannot catch or throw 2 times in a row.
(Chris) I will not use this Rule. With ‘no-limit’ to the number of participants in a circle, this Rule is obsolete.


Ropes cannot be moved.
(No Change)
 
Tubes cannot be moved.
(No Change)


If a tube gets knocked over after it has an item on it, there is a 5-second penalty and the item must be reset on top of the tube.
(Chris) If a tube and item are knocked over, the two must be set up right before the next item (in numerical order) can be placed on top of its tube. A penalty is enforced for the item touching the ground.
 
If an item is not caught, it is returned to the throwing circle and they can try again. (No penalty unless an item and tube are knocked over.)
If an item is not caught, it must be returned to Circle A. A penalty is enforced for the item touching the ground. And remember, items must be placed on the tubes in numerical order.


All penalties will add 5 seconds to the end time.
(Chris) Any Rule violation will result in a 5-second penalty – five seconds will be added to the timed attempt.

A 2-minute planning period is required before each round.
The timer starts at the end of the 2 minutes.
(Chris) When I enforce a 2-minute planning period, I’ll combine these two Rules.


Original Reflection Questions:
  • Did your team use the planning time effectively?
  • Who was responsible for the success or failure of the activity?
  • What roles and responsibilities did your process include?
  • ​Did any of the roles and responsibilities change after you started your process?  Why did this happen?
(Chris) Expanded Reflection Questions:
  • What problems did you anticipate and solve before you even got started? 
  • What problems showed up that you did not anticipate? What did you do about them during the activity?  What did you do about the problems after the activity?
  • Describe the planning that took place before a timed attempt? What did it look like? What did it sound like? What could have made your planning times better? 
  • Recall what happened within the group when a penalty occurred? What did it look like? What did it sound like? What could have been better about the reactions after a penalty? 
  • What specific behaviors led to your success? What specific behaviors lead to some of your failures? 
  • What do we want to remember about failures? How do we want to treat each other after there is a failure? Why is this important? 
There's a lot mashed up in the build I went through above. I hope you can see the tweaks I made to Karen's original Top It Off and why I made them. For some clarity I've written up a sample script for Top It Off 2 - what I would say to a group. 
top_it_off_2_script_1.0.pdf
File Size: 117 kb
File Type: pdf
Download File

We would love to find out about your build. How did you Tweak Top It Off? Leave us some notes in the Comments. 

All the best,
 
Chris Cavert, Ed.D.
0 Comments
<<Previous

    JOIN
    FUNdoing
    Fridays
    Team Building Activities sent to your email every two weeks! 
    Picture
    FREE Reflection Activity just for signing up! 

    Picture
    Processing for Beginners
    FREE Mini-Course

    Click for Information

    Some Team Building Tools at the STORE! 
    Picture
    Details & Purchase
    Picture


    Details & Purchase
    Picture
    Details & Purchase

    Blog Author

    Dr. Chris Cavert is an internationally known author, speaker, and trainer in the area of adventure-based activity programming and its relation to community and pro-social behavior development.

    Blog Purpose

    This blog is a space for hands-on programable fun - energetic activities and ideas that can be used as a means to bring people together; activities and ideas we as educators can add to our social development curriculums. 

    Categories

    All
    Action Songs
    Activities
    A Files
    A-Files
    Challenge Course
    Chiji Cards
    CUP Activities
    Ed Tech 4 Adv Ed
    Facilitation
    Fun Props
    Lessons
    Let's Talk About
    List Play
    Noodles
    No Props
    On Pedagogy
    Print N Play
    Processing
    Programming
    Puzzles
    Read This
    Repurposed
    Resources
    Small Group Activities
    Tools For Team Builders
    Top 10 Activities
    Variations
    Videos
    Virtual
    What? & Why?

    Archives

    April 2025
    March 2025
    February 2025
    January 2025
    December 2024
    November 2024
    October 2024
    September 2024
    August 2024
    July 2024
    June 2024
    May 2024
    April 2024
    March 2024
    February 2024
    January 2024
    December 2023
    November 2023
    October 2023
    September 2023
    August 2023
    July 2023
    June 2023
    May 2023
    April 2023
    March 2023
    February 2023
    January 2023
    May 2022
    April 2022
    March 2022
    February 2022
    January 2022
    December 2021
    November 2021
    October 2021
    September 2021
    August 2021
    July 2021
    June 2021
    May 2021
    April 2021
    March 2021
    February 2021
    January 2021
    December 2020
    November 2020
    October 2020
    September 2020
    August 2020
    July 2020
    June 2020
    May 2020
    April 2020
    March 2020
    February 2020
    January 2020
    November 2019
    October 2019
    September 2019
    August 2019
    July 2019
    June 2019
    May 2019
    April 2019
    March 2019
    February 2019
    January 2019
    December 2018
    November 2018
    October 2018
    September 2018
    August 2018
    July 2018
    June 2018
    May 2018
    April 2018
    March 2018
    February 2018
    January 2018
    December 2017
    November 2017
    September 2017
    August 2017
    July 2017
    June 2017
    May 2017
    April 2017
    March 2017
    February 2017
    January 2017
    December 2016
    November 2016
    October 2016
    September 2016
    August 2016
    July 2016
    June 2016
    May 2016
    April 2016
    March 2016
    February 2016
    December 2015
    November 2015
    October 2015
    September 2015
    August 2015
    July 2015
    May 2015
    April 2015
    March 2015
    February 2015
    January 2015
    December 2014
    November 2014
    October 2014
    September 2014
    August 2014
    July 2014
    June 2014
    May 2014
    April 2014
    March 2014
    February 2014
    January 2014
    December 2013
    November 2013
    October 2013
    September 2013
    August 2013
    July 2013
    June 2013
    May 2013
    April 2013
    March 2013
    February 2013
    January 2013
    December 2012
    November 2012
    October 2012
    September 2012
    August 2012
    July 2012
    June 2012

    RSS Feed

Proudly powered by Weebly